Thursday mid morning at work, I received a text from JB asking if - at very short notice - I could make it to his place for a game - after brief negotiation with my good lady, permission was obtained.
As it was a sudden summons, I obviously had no figures with me - what, don't you drive around with an army or two in the boot of the car, just in case - well no, even though forty years ago I was a Scout, I am not that prepared! Julian suggested another round of Conflict of Heroes (the Guadalcanal board game ) and this seemed the simplest option in the circumstances.
Sooo......surprisingly, I have lots of pics, even though there are no figures involved. Fortunately, I was able to choose the USMC again, as the Japs were up against it from the start. They outnumbered me by quite a large margin but I had on call artillery each move, an air strike on turn 5 (of 6 in total) and some reinforcements, including two M3 Stuart light tanks. The Japs got lots of reinforcements too, and started off with one victory point. They had some rules that restricted their freedom of movement EG negative Bushido points for any unit that did not start an activation phase as part of a group move. Every time the US killed a Jap unit, it was +1 victory point to the US, every time the Japs killed a Yank, it was +2.
The game took about three hours, including a stop for Saagwala, Aloo, Naan bread etc in the midst of the carnage, and resulted in an overwhelming US victory, although not QUITE as overwhelming as the actual historical event apparently.

The game box, board and rule book that we used tonight for our game of Conflict of Heroes

Initial deployment of the USMC

The reinforcements that I had available to come on later - infantry on move 2, tanks move 5, airstrike move 5 too
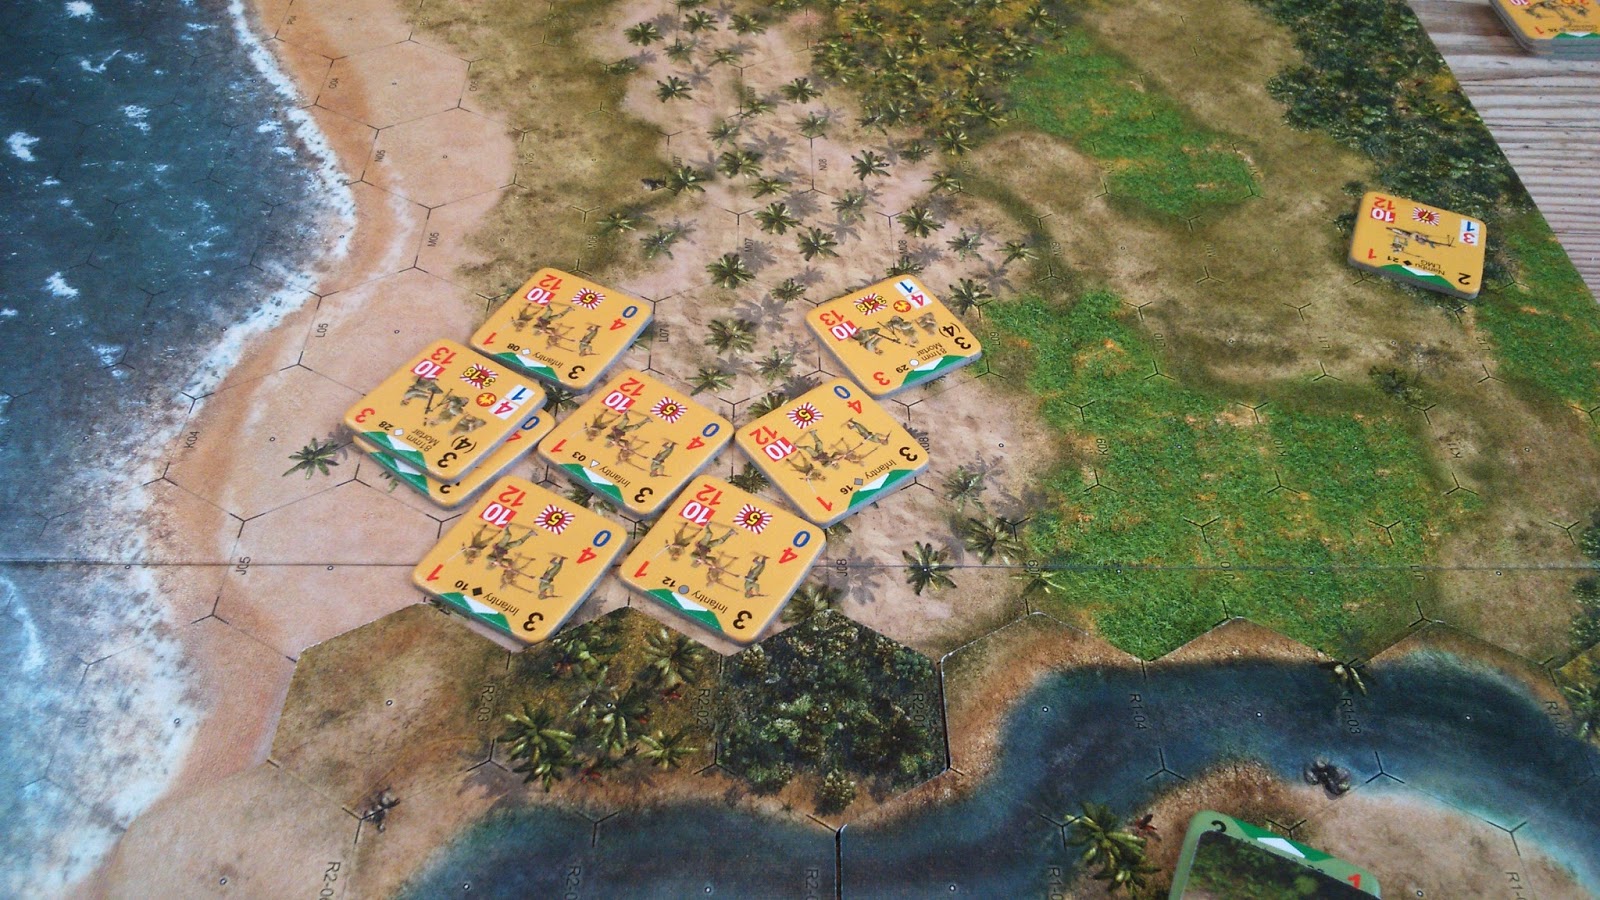
The initial Japanese deployment - US positions were just below the river

Another view showing the initial dispositions of both sides

At the start of each turn, the US player had to write, secretly, where he intended the off board artillery to hit at the start of the next turn - so, in turn one, there was no artillery, but thereafter, it was effectively the first thing that happened at the start of the move. This is the start of move two, with the black aim market in the position I had selected, surrounded by juicy Jap targets! Once placed, I rolled 1 D6 - 1 or 2 meant it was not on target, by the number scored, then I rolled again to determine direction of drift, so even if I was off target, it could still work out ok, as I got to roll for hits on each unit in the adjacent 6 hex's - 7 hex's of potential targets in total, and on some occasions, there might be two or three units in a single hex!

Position early in the third move - my artillery aim this time was to the right of the most right hand Jap unit - compare above with the previous pic and you will notice the solitary Jap unit on the very edge of the table is absent - the first of many victims of USN gunfire support!

Jap casualties after the first two moves - 8 gone and I may have lost one at this stage - possibly none....

My not so secret weapon - without this, the Japs would probably have been able to swamp the US with their massive advantage in manpower. The orange thing that looks like a stylised rose is actually the template to indicate which hexes are affected by gunfire

The tally board midway through the game - US leading by 6 victory points. At this stage, the US had lost 3 units and the Japs had lost 9!

Game move three - more Japs have arrived to reinforce the assault - they came on anywhere on their side of the river and at least two hex away from it

A essential part of all our evening games!

The Japs mass on the river to begin their assault - at this point, my next aim point for the NGS was the middle of the stream in approximately the centre of this pic, on the expectation that, by the time the shells arrived, the stream would be full of Japanese troops

A general view of our playing area - cups are not for tea or coffee, but contain the tiles you draw to see what effect a casualty hit will have

Here they come - the Japs start their push across the river - note the absence of the two forward US positions from the jungle area immediately below the river - they had been wiped out by this stage. Bot fear not, in my NEXT phase, the gunfire will be targeted right in the middle of this bunch!

General view of the game around turn four of the six permitted - US reinforcements are in the bottom right, the Japs are just about across that river!

Next turn and they are over the river and scoring three Bushido points for having three units on the US side, but don't panic.....

Shortly afterwards, and there is only one Jap unit remaining on the US side of the river. Note the absence of any significant number of Jap units on the other side too - they are mostly in the Samurai version of Valhalla!

The position at the end of the game - the defending US forces far outnumber the remaining Japanese

The final butchers bill for the Land of the Rising Sun - 17 units destroyed for the loss of 4 US. Julian's previous ability to pull "No Hit" cards out every time I scored a hit seemed to desert him tonight - I am pleased to say! The main agent of destruction though was the gun fire support - on some turns, I was testing four or six Jap units, with a +6 for the naval bombardment - often meaning I only had to score 4 or 5 with 2 x D6 to get a hit - and if I beat the score by 4, that meant two hits, which happened on a couple of occasions.
The plan is, next time to convert this to a game involving 15mm figures - unfortunately, I have the Japs, so I hope the scenarios get better!
No comments:
Post a Comment