Tuesday 26 March 2019

Sunday Game - "Cruel Seas"


On Sunday eight of us had three games of Cruel Seas using Rick recently acquired and painted collection of WW2 ships.

The games were of relatively short duration - we had 4 x 2 player games with a German S Boot (E Boat to we Brits) against two British MTB's - apparently to even things up although the MTB's in my first game had no trouble dealing to my S Boot in pretty quick order!

After lunch we had two 2 v 2 player games involving an Allied "convoy" (one merchant ship and two escorts) taking on assaulting Kriegsmarine forces - again, I played the Axis in both games, and again, it felt like the RN dealt with our attack pretty easily, although in the last game, the addition of an extra S Boot to the attackers did mean we managed to sink one of the British escorts.

My feelings on the game and rules? A bit like every other naval game I have played - and also air to air wargames  - they look better than the substance of the game. Really, they are very much just the same game over and over - that's probably not quite right, but I prefer my battles to involve "men" rather than  machines. Too many stats, too many different weapons with different ranges causing different amounts and types of damage, they really just turn into an artillery duel and lot of the result relies on luck of the dice rolling. For these rules specifically, I think its far too easy to score a Critical Hit. For some weapon types, you can be rolling 8 or even more D6 - and any 6 you roll is a Critical Hit. There are 10 of these, decided by rolling a D10 (who would have thought!) and they all have pretty bad outcomes for the one on the receiving end. My opponents seemed to roll two or three sixes virtually every time they fired at me - hence the reason  my S Boot was blown up by an MTB in the first game!

Anyway - a fun game for a one off every now and then - like the WW1 planes we did a couple of weeks ago on a Friday evening - but I would not want to play either of them all the time. The models however are VERY nice so here are a whole lot of pictures of the first two games - I think I had lost interest by the third game and forgot to take any pictures!

Game 1 - my S Boot and its attributes card


Game 1 - the two RN MTB 's and relevant cards

The two MTB's head to battle

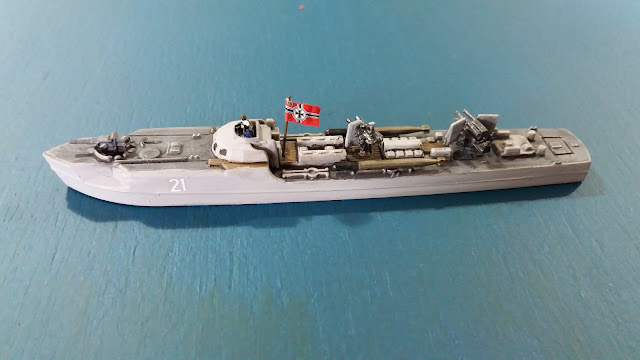
My S Boot - I think they are pretty nice models considering this one is probably 50-60mm long

The two MTB's separate to come at me from  different directions

MTB's closing in 

One of Julian's MTB's got into a position to rake my S Boot from the rear

In return fire I got a Critical Hit that caused the MTB to continue on its current course with either rudder damage or wounded helmsman!

The ten possible Critical Hits, which I think are too easy to get

The second MTB blasts the S Boot from close range

And even closer range next time! They got a Critical Hit Number 10 on me and my bloody torpedo exploded and that was that - took about twenty minutes!


Game 2 - my German Corvette/minesweeper with two x 88mm naval guns and also a 37mm semi auto cannon as well as 20mm guns

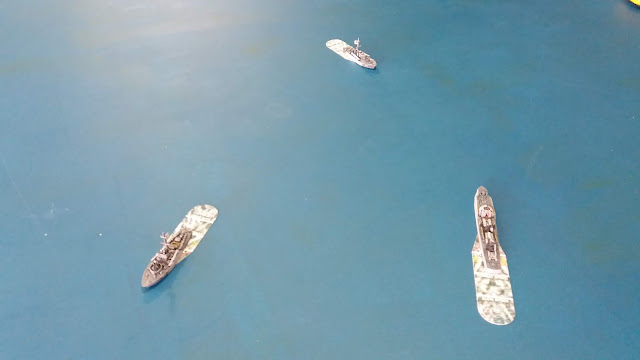
The Allies - an American "Liberty" ship and RN corvette (I think)

I think this RN ship is a Thorneycroft....

Rick's beautiful U Boot - not an "official" Cruel Seas one and not a waterline model until he made it so!


The U Boot surfaces to the rear of the "convoy" and looses off four torpedoes - but why didn't he come from the front flank....?

The allies steam on imperturbably 

Until they spot the torpedoes and the Liberty ship starts to make evasive manouvres!

Meanwhile, ahead of them, my surface vessel blasts away at the Liberty ship too

The last picture is from the other guys game - I only took it because they had a Stuka involved!


The outcome of Game 2 was my ship was sunk, the Liberty ship evaded the torpedoes and easily outran the U Boot to get off the other edge of the table.

The Liberty ship, like the U Boat, are not part of the range offered by Warlord - Rick found 1/350 
(close enough to the 1/300 of the official models) kits from Trumpeter I think. He is now keen to look at getting a 1/350 model of the Tirpitz - which would be interesting, as its listed as 710mm and presumably could hit anything on our 12' by 6' from anywhere on the table!


Saturday 23 March 2019

Friday Night Game - Russian Civil War


After an interlude of several weeks, Chris, Mark, John, Rick and I had a great catch up with Julian over an RCW game using "Red Actions" on Friday evening. Julian and I provided the figures - Chris, John  and I commanded the forces of Proletarian Egalitarianism, whilst Julian, Mark and Rick led the Reactionary Oppressors of the People!

The aim was for a larger Red Force to take control of a bridge, defended by a White force occupying prepared positions. The Reds in particular had a lot more cavalry. Each side had the opportunity to call up air support, which arrived on a 5 or 6 and stayed over the battlefield for 3 moves unless shot down or driven off. This was a one shot wonder - after three turns, the plane would depart, never to appear again.

This is approximately the position of the opposing forces at the start of the game. Below is an image looking down the table from the left end of the map above.


Following are some images and a couple of maps showing the progress of the action

Julian's two battalions of Whites in their right flank redoubt, supported by an MG and cavalry to their rear

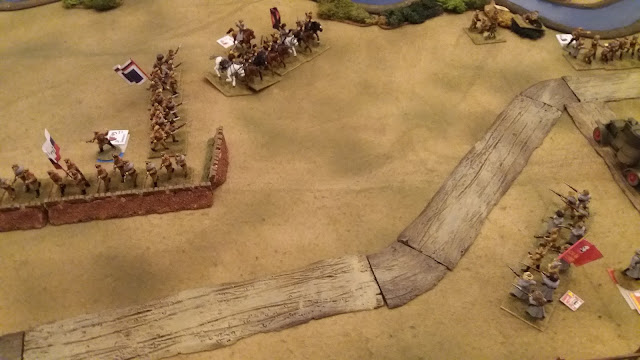
Marks two battalions in their left flank redoubt, again with an MG in support. The bridge is just to the rear of this position, with an artillery piece and the CO

Some of the Red cards - Charge Fear Serious and Rally are test numbers you have to roll equal or less to pass. Lower figures relate to movement and maximum range of fire (in inches). Fire and melee factors are multipliers per base EG 3 bases of Cossacks = melee strength of 21, or 4 bases of Red Guard firing = firing strength of 16.

At the end of move 1, Chris rolled a 5 and brought on the Red Airforce to target that bloody White artillery piece - Mark designated the adjacent MG as an AA piece - and drove the plane off! In the second move, Julian successfully activated the White plane - the result of both planes being activated at the same time is the became engaged in aerial combat and drove each other off - no more air support :(. However, the fact Mark designated that MG as AA meant it was useless for the rest of the game.

Chris advances in the centre on Rick's somewhat exposed and isolated command - that's what happens when you turn up to the game half an hour late mate!

Julian redeploys one of his battalions to counter the threat of an outflanking movement from Chris

Probably move three - I redeployed the Red Guard from our left flank (opposite Julian) to our right flank, to combine with John in assaulting Marks redoubt and open the route to the bridge

The Red Guards commander - Comrade Commissar Katherina

Below - the position after a couple of moves - my Red Guards redeploying are crossing the road behind Chris, whilst my partisan Red Cossacks are in the wood facing Julian's redoubt supported by my MG and mortar

Johns cavalry in the woods, flanking Marks redoubt

Julian advances with the White cavalry to engage Chris - they exchanged fire and both were driven back

John's infantry slowly edge forward as the defenders of Mark's redoubt are assailed from three sides

The massed Red infantry assault on Marks redoubt - three battalions from John and my two Red Guards. The leading unit is in a bad way but fell back and recovered

One of my Cossack units passes around the flank of Julian's redoubt


Below - last map showing approximate positions near the end of the game
Johns combined Red cavalry charged Marks infantry unit and pushed them back. The gun fired at them from the far side of the bridge but had minimal effect

Another view of Marks position near the end of the game

My Cossacks catch Julian's White cavalry from the rear - only option in these rules - they SURRENDER!

Last view of the position in the centre - my MG and mortar supported Chris by taking out Rick's equivalent support crews. The Whites big mistake was that they concentrated the whole game on trying to wipe out the armoured car - targeting it with the artillery and Rick's entire infantry fire power - fours stands of rifles, a mortar AND an HMG - and never dented it! Meanwhile, they might have destroyed one or more of the supporting infantry units if they had fired on them instead!

A glorious victory for the army of the masses! These are quite interesting rules with a lot of twists and turns EG both sides had units classified as "Mobs" (although we failed to notice it on the cards from the start of the game!) which meant they could fire, melee or retire at will but to do anything else EG advance or formation change, they had to roll 1 D6 - a 1 or 2 meant they could not act - and if the Reds got a 1, their officer was shot by a commissar who then took command of the unit! As a consequence of these many intricacies and the fact this is only our second game with these rules, it took us about 5 hours to fight a six or eight move game! Good fun however - usually is when you win! On Sunday I am off to Barry's where most of the same crowd will have a game of Cruel Seas using Rick's recently acquired naval forces.


Friday 15 March 2019

War of 1812 - 3rd Foot "The Buffs"


This battalion is not quite completed as it is missing a command element - which I will have to purchase separately - but I felt there was enough here to post.

The 3rd Foot arrived in N America in 1814 and remained until the war ended in 1815 - the only major engagement they participated in was the Battle of Plattsburg. As a regiment with buff coloured facings, their "small clothes" and cross belts etc were also buff coloured rather than the usual white. Another unusual distinction was that drummers are NOT dressed in reversed colours - one of those anomalies one finds with uniform regulations in the British army!

One slight complaint I would make about the Perry plastic Brits is the absence of uncovered Belgic shakos, showing the cords and front plate - it would be nice to have that option too - but its only a minor complaint as I say.

Next up I have three elements - 9 figures - in the older Stovepipe shakos - not sure if I will paint them up as a regular British battalion or a Canadian militia unit....

Here are the images  of the Buffs:


Sunday 10 March 2019

Napoleon in Egypt Game
Painting of the Battle of Alexandria


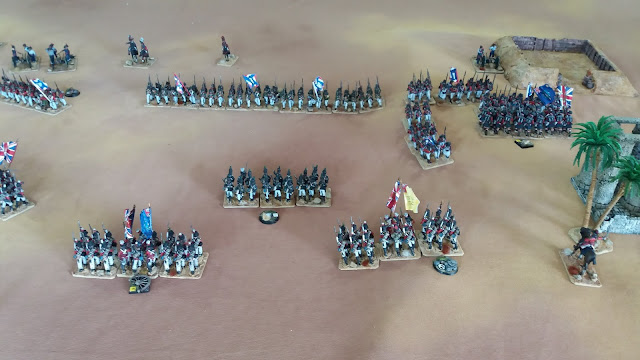
Today we fought the third (I think) game in our occasional campaign of the British and French confrontation in Egypt early in the Napoleonic period. This time, the Brits had advanced following their very close fought victory in the previous game and had encamped in the desert near Alexandria. The dastardly French made a sneaky night march across the sand and appeared out of the gloom just as day broke. A single shot from the British forward picquets awoke the slumbering redcoats, and battle was joined.

The initial layout was based roughly on the battle of Alexandria but this was not a refight and number of troops on each side was roughly the same (I think, although it did not feel that way to we British!)

The French had an advantage in being allowed to make a plan and deploy as they wished, whereas the British were in their camps and could only react from there once the alarm went up.

In essence, the game developed into three linked but almost separate battles. Rick, commanding all the French cavalry on their right flank, took on Adrian on our left. Chris in the centre engaged both Paul and Barry, and Mark, with assistance from the left of Chris's centre, took on my brigade on the British right wing.

I had five battalions plus a single gun low on ammo and Mark had four demi brigades ( I think) of three battalions each - Chris had the same. I think all the Brits had four or five battalions, so on paper it would look evenly balanced but as you will see from the pictures, that was not quite the case in practice.

The outcome felt like a foregone conclusion from pretty early on and just before lunch, it looked like Chris would win the game for the French in the centre - in the event, it took a few more turns after lunch for the end to come, but we were all done and dusted by 2pm, which is very early by our usual standards.

The outcome of the total annihilation of the British army is that the next (last?) scenario in the campaign will be wholly fictional, with the Brits attempting an nineteenth century Dunkirk style evacuation, under pressure from an advancing French army.

Here are the pics and brief descriptions of what I know/can recall....

The table upon our arrival - this is the British left flank

Table as the game commenced - the British right flank. That's Eighteen battalions of French you can see advancing against my forward defensive position

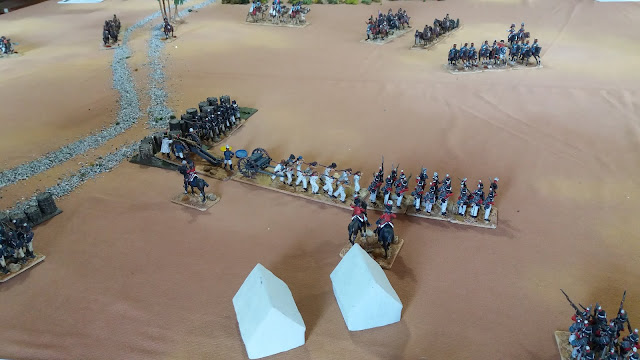
The forward redoubt manned by the 28th foot and a gun with very limited ammo

That's a lot of Frogs out there.....!

As it was night, a die roll per unit per turn (for the first three turns) caused some confused marching

Around turn five, the Brits are awake and the guard battalion is retiring to join up with the main force advancing from the tent lines

In the centre, a couple of lone battalions behind gabions face the advancing French

The British left wing who were assaulted by the entire French cavalry force

French cavalry caught a unit in the flank, destroyed them, then broke onto this hapless artillery crew..

My brave boys - five battalions face around twelve or fifteen coming the other way!

Our one and only mounted unit charges in column (!?)

In the centre, British reinforcements come forward to the aid of those units behind the gabions

We have to give it a go - after enduring and surviving one round of close range musketry from a larger force I decided trading shots would not work and we had to resort to giving them the cold steel...

...so my five battalions charged forwards to death or glory.

Back on the other flank, Adrian is having a tough time of it containing Rick's cavalry

And in the centre again, there seem to be a lot more Frenchies than Brits!

Half unit of dismounted light dragoons versus full unit of mounted cavalry - bet you can guess the result!

The gabions did give the unit behind them very significant benefits - here Chris deploys three battalions to one but Paul saved on anything but a 1!

The advancing demi brigades on my flank, seen from behind the French position

The result of my charge - unit on the extreme right routed and French have occupied the ruins. the 42nd Highlanders did not win so are still engaged. Two of the three units that charged in the open to the left were pushed back, leaving the solitary unit of Corsican Rangers to fight three battalions on their own....not quite what we were hoping for!

Basically the same position from the French perspective
But wait, what's this? The plucky little Italians won the next combat against the combined might of the French and pushed them back!

I pulled the Corsicans back and a line charged a column - but contrived to be defeated!

Part of the scenario was that if the French could get six units off our table edge, they had captured our depot and the campaign in Egypt was over - here two battalions are about 300mm from our table edge....

On the other flank Adrian is gradually giving way to Ricks horsey boys....

That's three units close to reaching our table edge..by this stage my brigade had failed a morale test and quit the field so the game was really over, but we carried on to the bitter end

A wall of French advancing on two British Guards battalions.

Ricks cavalry hit one of Adrian's remaining two battalions in the flank - not good!

The centre from the French side - shortly after this was taken, Paul and Adrian both failed brigade morale tests and followed me towards the boats!

Close up of the unit that staunchly held out behind the gabions against all comers

The centre of the table with only Barry's four British battalions remaining

The British left flank devoid of my troops as the French march unopposed through our camp.

I am not sure if I have ever participated in such a total drubbing - the British were wiped out in this game, and in a relatively short time too. Unfortunate for Mark as he probably had plans for a few more games in the campaign but now, there will only be one, as the British attempt to withdraw and avoid a total disaster!