Wednesday 20 December 2017

R.C.W. - Some More Completed Figures

I have now finished off all the figures in Schelms that I currently have - I need to purchase a few more to complete these two units, then move on to the next batch of Bolsheviks, including some sailors (of course!)

I also based the armoured car using a new technique that has worked out very nicely in my opinion...

 First up, three images of the finished armoured car....

 Below - first Schelm command and two units of rifles - a mixture of Copplestone and Brigade games figures
 Next, the second command unit and two more bases of riflemen
 Two bases of LMG teams - the gunners are Copplestone and the other figure in each case is by Brigade Games
 The other LMG team from a better angle

Sunday 17 December 2017

R.C.W. - Some More Figures Completed

I have made a fair bit of progress with this project over the last few days and now have a Bolshevik Armoured Car (Old Glory resin and metal model) plus parts of two battalions completed. On the painting table I have almost the same number of figures again about 50% completed

 First up are three images of the Austin Armoured car. I may still add some Cyrillic slogans or red stars and I will probably put it on a base to protect the wheels/axles


 Above and below a mixture of Brigade games "Trotskys Red Guard" and Copplestone "Bolshevik Elite Infantry" wearing the distinctive Bolshevik head dress described by some as a Schelm

 The command element and LMG element of a battalion of regular Bolshevik infantry - these are all Copplestone "Back of Beyond" range
 The command element from a different angle - the flag was sourced from the net
 Above and below - three elements of Copplestone Bolshevik infantry

When completed, each unit will comprise one command element, two LMG elements and four rifle elements - a total of seven bases per unit - depending on the scale of the engagement, these will represent a platoon, company or battalion as required.

Monday 11 December 2017

Last Game of 2017 - 15mm WW2 in Madagascar!

On Sunday 6 of us (one as umpire/game master) played a 15mm WW2 game based on the British invasion of Vichy French held Madagascar in May 1942.  The following extract sets the scene...

The Battle of Madagascar was the British campaign to capture Vichy French-controlled Madagascar during World War II. The seizure of the island by the British was to deny Madagascar's ports to the Imperial Japanese Navy and to prevent the loss or impairment of the Allied shipping line. It began with Operation Ironclad, the seizure of the port of Diego Suarez near the northern tip of the island, on 5 May 1942.
Following many reconnaissance missions by the SAAF, the first wave of the British 29th Infantry Brigade and No. 5 Commando landed in assault craft on 5 May 1942. Follow-up waves were by two brigades of the 5th Infantry Division and Royal Marines. All were carried ashore by landing craft to Courrier Bay and Ambararata Bay, just west of the major port of Diego Suarez, at the northern tip of Madagascar. A diversionary attack was staged to the east. Air cover was provided mainly by Fairey Albacore and Fairey Swordfish torpedo bombers which attacked Vichy shipping. They were supported by Grumman Martlets fighters from the Fleet Air Arm. A small number of SAAF planes assisted.
The defending Vichy forces, led by Governor General Armand Léon Annet, included about 8,000 troops, of whom about 6,000 were Malagasy tirailleurs(colonial infantry). A large proportion of the rest were Senegalese. Between 1,500 and 3,000 Vichy troops were concentrated around Diego Suarez. However, naval and air defences were relatively light and/or obsolete: eight coastal batteries, two armed merchant cruisers, two sloops, five submarines, 17 Morane-Saulnier 406 fighters and 10 Potez 63 bombers.
The beach landings met with virtually no resistance and these troops seized Vichy coastal batteries and barracks. The Courier Bay force, the 17th Infantry Brigade, after toiling through mangrove swamp and thick bush took the town of Diego Suarez taking a hundred prisoners. The Ambararata Bay force, the 29th independent brigade, headed towards the French naval base of Antisarane. With assistance from six Valentines and six Tetrarch light tanks of B Special Service Squadron they advanced 21 miles overcoming light resistance with bayonet charges. Antisarane itself was heavily defended with trenches, two redoubts, pillboxes, and flanked on both sides by impenetrable swamps 
On the morning of 6 May a frontal assault on the defences failed with the loss of three Valentines and two Tetrarchs. Another assault by the South Lancashires worked their way around the defences but the swamps and bad terrain meant they were broken up into groups. Nevertheless, they swung behind the Vichy line and caused chaos. Fire was poured on the Vichy defences from behind and the radio station and a barracks were seized In all 200 prisoners were taken, but the South Lancs had to withdraw as communication with the main force was nonexistent after the radio set failed. With the French defence highly effective, the deadlock was broken when the old destroyer HMS Anthony dashed straight past the harbour defences of Antisarane and landed fifty Royal Marines amidst the Vichy rear area. The marines created "disturbance in the town out of all proportion to their numbers" taking the French artillery command post along with its barracks and the naval depot. At the same time the troops of the 17th Infantry Brigade had broken through the defences and were soon marching in the town. The Vichy defence was broken and Antisarane surrendered that evening, although substantial Vichy forces withdrew to the south.

Rick and I played the French - unfortunately for us, our defensive position did not prove to be anything like as strong as that encountered by the British in May 1942, and we were comprehensively beaten by the British, commanded by Paul, Chris and Mark.
We did have the satisfaction of making the British pay a high price in dead infantrymen, but the British tanks and particularly their artillery easily overwhelmed our meagre forces. We lost every single unit bar three 75mm guns I managed to pull off right at the end of the game, as the 50 Royal Marines appeared in our rear!

Here is the map and following that a few pictures I took at random intervals during the day.


Chris advanced at the top of the map with the artillery whilst Mark advanced at the bottom with the armour. Paul came up the middle with the bulk of the infantry.

 Marks initial recce force in bren gun carriers found our first line of defence but were wiped out doing so.
 Our first unit of 3 R35 tanks emerged to confront the Brits, but failed to do any damage and were soon burning wrecks. Likewise our two 20mm AT guns proved ineffective against anything except the unfortunate bren gun carriers!
 The massed British infantry advance - not many of them would live to see Diego Suarez!
 WW1 vintage 18lb field guns head forwards - these proved one of the most effective tools in the British arsenal, along with a battery of 25lb ers
 A general view of the first ridge defended by the French. In the real battle, the British came quite a cropper here and were basically halted - in our game, the British lost the four carriers of their recce force then easily destroyed our defending force before advancing to the second line.
 Some of Marks British armour moving in line abreast
 British and French infantry slog it out in the first position - one French unit bravely charged and destroyed a British company, but were then shot to pieces by two or three others!
 The 18lb guns deployed to finish off the defenders of the first line whilst the second recce force reaches the second defensive position
 More of Marks armour skirting the flank of the first defensive position

French AT guns making a run for it from the first line of defence...they did not get far.... the 18lb field guns can just be seen deployed for action in the top of this picture - you can imagine the rest!


Friday 8 December 2017

R.C.W. - Finally, some progress!

I have finally made it to the end of one, almost two, units for my new Russian Civil War project.

Firstly is a cavalry unit of ten figures, from the Old Glory WW1 range. I like to use OG if I can, due to the cost effectiveness of this range. I usually have an "Army Card" running, at a cost of $US50 per annum - this provides a 40% discount on a range that is already pretty competitively priced. Admittedly, they do not seem to have added one sculpt in the last 15 years, and some of their ranges are not the best - think early Napoleonic in particular - but when you get a good one, I think they are as well done as many of the more expensively priced ranges.

Anyway, enough justification - they are probably a bit smaller than the Copplestone and Brigade figures I will be using for most of the infantry, but as they are mounted, the difference wont be too obvious

 Here is the officer figure and his bugler
 The standard bearer and a trooper
 Two enthusiastic charging troopers
 A sergeant (with pistol) and a trooper
 The last two troopers
 A group of three bases together. All the figures come minus the right hand - you can choose from about twenty options - there are enough open hands to make this a regiment of lancers, for example - I only used one of these, for the standard bearer

The next unit is not 100% complete because it does not have a command base yet. I am in a bit of a quandary about this - the figures are Hinterland female sailors painted up as the Red navy - but the command who come with the set are more appropriate for a colonial setting, as the officer and sergeant are sporting helmets akin to a pith helmet or British Home Service helmet of the late 19th century....I have them half painted and will probably just use them but they wont look quite right!
 Above are all five bases of the sailors that I have painted - this comprises two of the 5 figure packs and one 6 figure unit builder pack where you get 6 all the same - the firing figure who appears on every base (yes I do have one left over!)
 Above and below - close ups of a couple of the bases - I think these have come out well.

Thursday 30 November 2017

R.C.W. Reinforcements from Brigade Games

My latest arrival was a carton from the US containing the bulk (so far) of the RCW figures I have purchased - a mix of Brigade and Copplestone.

The Copplestone are slightly nicer in my opinion but the Brigade ones are fine too and I think they are close enough in scale to mix together, although the former are a bit bulkier all over. There are also slightly annoying differences such as the Copplestone all having bayonets fitted whilst the Brigade ones don't....but that's a minor issue really.

Now I have to set to and get some serious painting done - so far I have only managed a few of the Hinterland sailors and the Tsarina!

Here is the full list and an image of the recent arrivals - a total of 56 miniatures. The last of my first round of orders for this period, from Siberia Miniatures in Russia, are here - the PO attempted delivery yesterday and left a card so I just have to arrange to uplift them from the depot.


Sunday 26 November 2017

Late War WW1 Game
Today I managed to slip the leash of familial restraint and do something I WANTED to do on a Sunday - which of course, was play with toy soldiers with me mates!

Rick had set up an imaginary scenario in the late war period, with French and American forces pursuing a depleted German force who were fighting an offensive rearguard action. I assume this was envisaged to be part of the 100 Days Offensive in 1918 - as per the quote below from Wikipedia...

"By late April 1918, the danger of a German breakthrough had passed. The German Army had suffered heavy casualties and now occupied ground of dubious value which would prove impossible to hold with such depleted units. In August 1918, the Allies began a counter-offensive with the support of 1–2 million fresh American troops and using new artillery techniques and operational methods. This Hundred Days Offensive resulted in the Germans retreating or being driven from all of the ground taken in the Spring Offensive, the collapse of the Hindenburg Line and the capitulation of the German Empire that November."

Our forces consisted of three battalions of Americans supported by the lone French aircraft on our left, a battalion of the French Foreign Legion, a small tank and battery of guns in the centre and three battalions of French infantry with two HMG and a trench gun on our right - I commanded this force. 

Opposing us, the Germans had two battalions in each position, supported by HMG's. In the centre, they occupied a ruined village and had the support of an A7 tank, and on their right, opposite the Americans, they had artillery.

My three battalions did very well against the two battalions of Germans, employing concentrated fire power of an HMG (4 dice) seven bases of infantry (1 die each) and an LMG (3 dice) to take out the first battalion and HMG for virtually no loss to my command. I was then able to flank the second battalion facing my advance and put three battalions of fire onto this single unit, with the inevitable result.

One of the two German battalions in the centre advanced to support their left wing but soon beat a retreat. The A7 tank lumbered slowly towards my force but by this time, the Legion Etrangere and the artillery had got in on the act and were causing casualties in the ruined village.

On the other flank the Americans made hard work of overcoming the stubborn German resistance but eventually were able to drive off their opponents, albeit that only one of their three battalions remained on the field to claim La Gloire! The two German battalions in the centre realized the game was up, and we ended around 2pm.

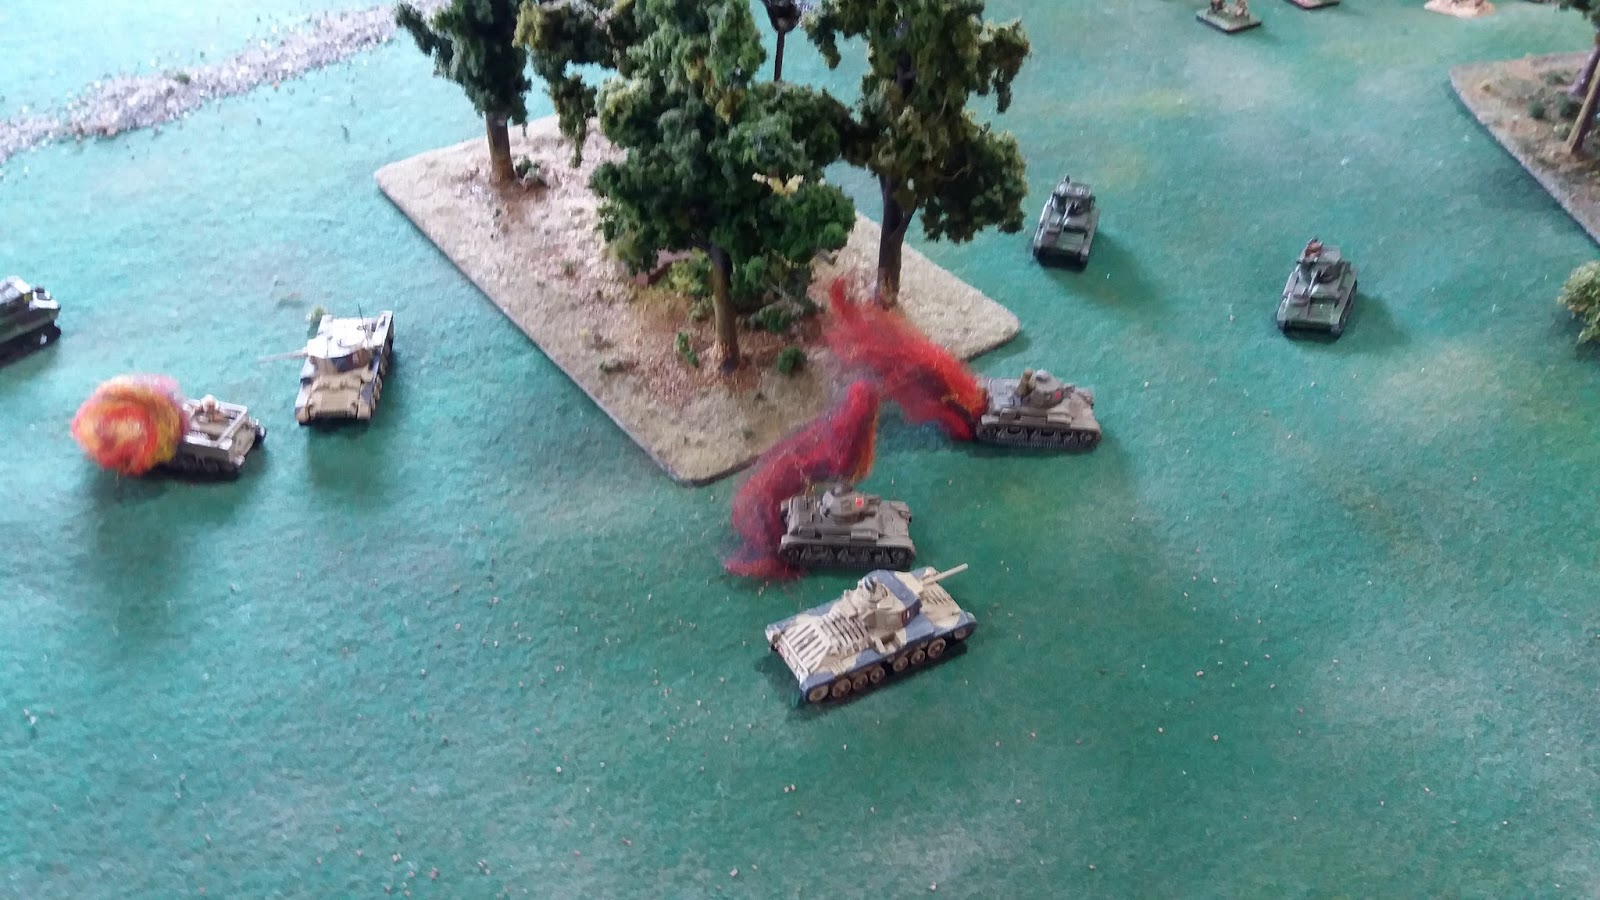
Here are some pictures I took of the action


 The partially destroyed village occupied by the German rear guard
 The French on our right begin their advance
 On the Allied left, our US allies move forward....
 ...whist overhead, they are supported by the French airforce
 A general view of my three battalions moving against Adrian's Germans
The view of my advance from the German lines
 Another view from the position of Adrian's second battalion
From the rear of the German centre commanded by Paul
 The Poilu's storm forward with great elan.
 The German high command look a bit concerned
On the German right, Barry's force is making life difficult for Mark's Doughboys
 But they are still advancing in good style - tres bon, mes amis!
 The scene of our first triumph - the German HMG and first battalion were previously in possession of this hill
My attacking force concentrates fire on Adrian's remaining battalion
 As my right wing swings in to envelope him from the flank
A last view of my advance from Adrian's position before his unit was destroyed
Barry's force moves forward to engage the Americans
Above and below - the French advance moves inexorably towards  the village in the centre of the table

The A7 moves into position to act as a mobile pillbox - it had two HMG's from three of its four sides
But the game is over - apart from the troops in the picture, the rest of the German force had been destroyed


The Foreign Legion supporting my attack on the village