On Friday four of us got together to play a Wars of the Roses game using the "To the Strongest" rules set on a table marked off into squares. The figures are a mixture of our hosts collection by various manufacturers including Old Glory and Front Rank, and one of the visitors, who has built up a sizeable force of Perry plastic figures for this era.
As we appeared to have figures and heraldry representing both Yorkist and Lancastrian factions on both sides of the table, its a bit hard to differentiate, so my report is written from the perspective of my side, and the "others" will be referred to as the enemy!
The sides were reasonably balanced, the enemy comprising the Perry WotR collection of Mark, blogger of "1866 and all that" and our side being the hosts collection. The bulk of both forces were infantry, quite a lot of archers and some dismounted men at arms and spearmen/halbadiers. Both sides had small cavalry forces on each wing as well.
The game commenced with both sides advancing towards the enemy and then engaging in long range archery, all of which seemed to be pretty ineffectual. The "enemy" had the better of things on our left wing initially, despite my partner expending vast numbers of arrows on their advancing forces. On the right wing, I threw forward my cavalry in a charge to catch out an exposed unit of archers, but they passed a test for closing fire then caused a casualty I failed to rebut, and the cavalry went into the melee disrupted, meaning they had the same chance of causing a casualty as the archers did. After a round of combat, each side had suffered a casualty and saved it, but I had to test for the attached leader and he received a light wound! I pulled the cavalry back to reform whilst a second unit entered the fray.
On our left, Marks infantry advanced and seemed to be gaining the upper hand, pushing our forces back beyond their starting positions. He held his cavalry back, perhaps intending to use it in a coup de grace when our left wing was teetering.
On my flank, John and I continued to trade blows, but as sometimes happens, a sudden run of good luck with activation and effect cards saw two or three of Johns units swept from the field and my cavalry was beginning to flank him and in a position to roll up the entire enemy line.
Meanwhile in the centre, my Burgundian crossbowmen were assaulted by dismounted knights with double handed weapons. Fortunately they were behind pavise and slightly harder to hit - they survived the assault and miraculously inflicted a casualty on their attackers - next turn, the fight continued and my crossbowmen defeated the knights and advance to flank the unit of archers who had been forced to change their facing by the flanking manouvre of the cavalry.
On the other wing, Julian had stabilized his forces and when Marks mounted knights finally charged the shire levy bowmen, they were unable to overcome the resistance of these staunch yeomen of England.
The rate of attrition was high on both sides, but the enemy had by this point suffered so many loses that their army morale (represented by a pile of coins from which two were removed for each lost unit) was all gone, whilst we still had 2 or 4 coins remaining on our side.
A good fun evening with a simple set of rules that may not be the most "realistic" (whatever that is) but moves along quickly and prevents any predictability, as you never know how many activations or moves your force will have in any given turn.
Some of the images are rather indifferent in quality - I think it has something to do with the subdued lighting in the room where we were gaming.....but I have included them all anyway.

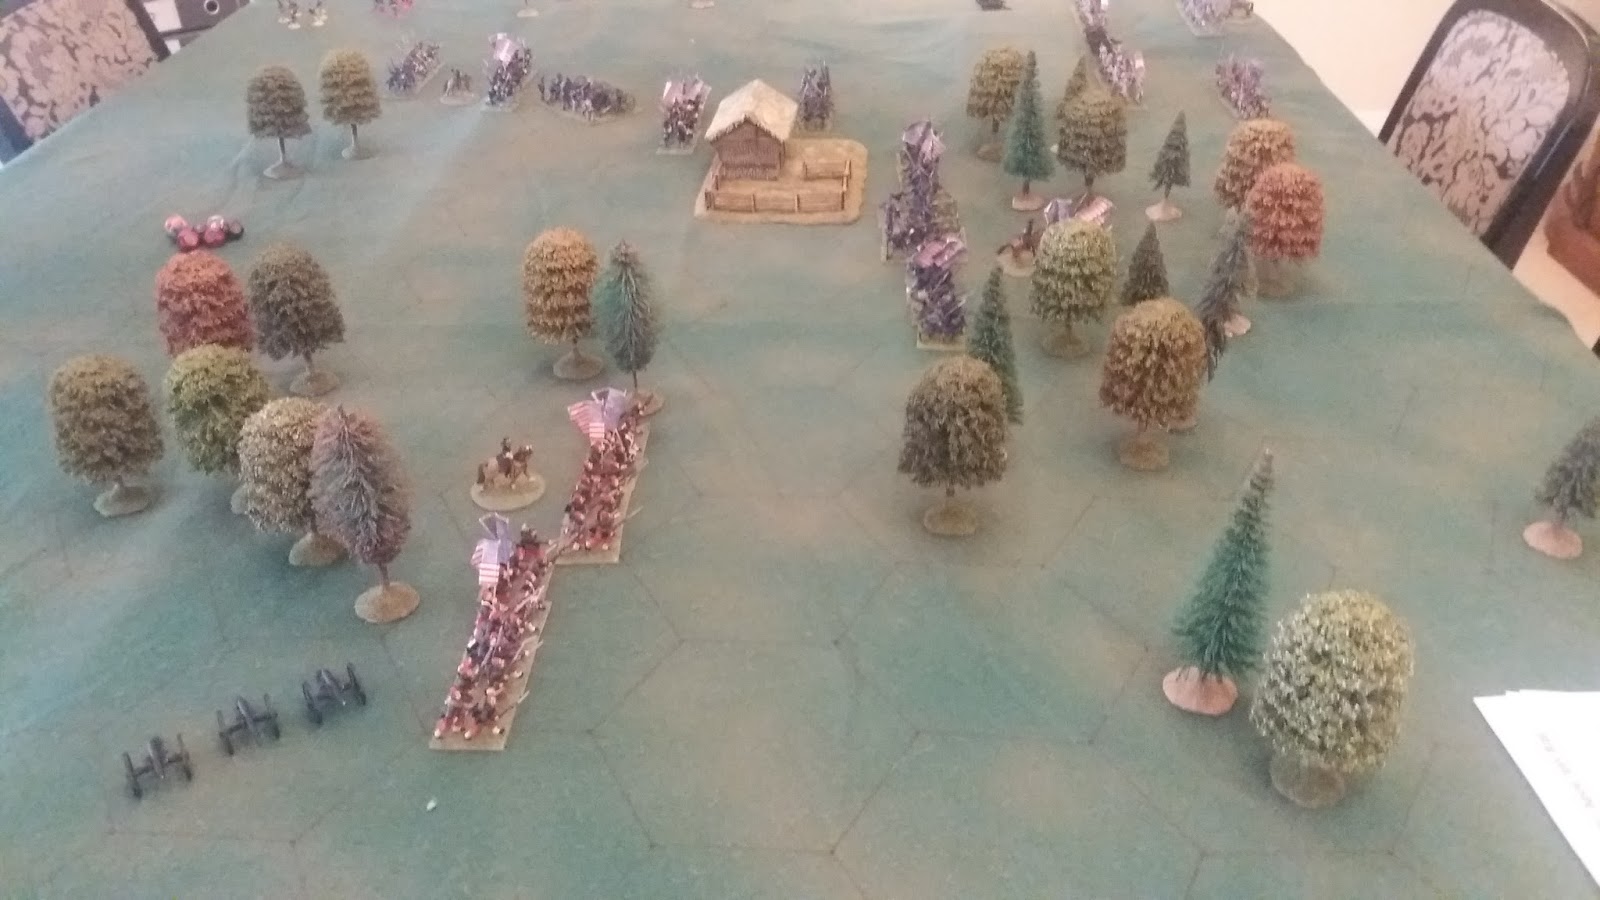
A map showing roughly the starting positions of the two forces and layout of the battle field - I was on the blue side

General view of the table at the start of the game - our side is the left looking at this image

Close up of the Burgundian crossbowmen - the heroes of the night!

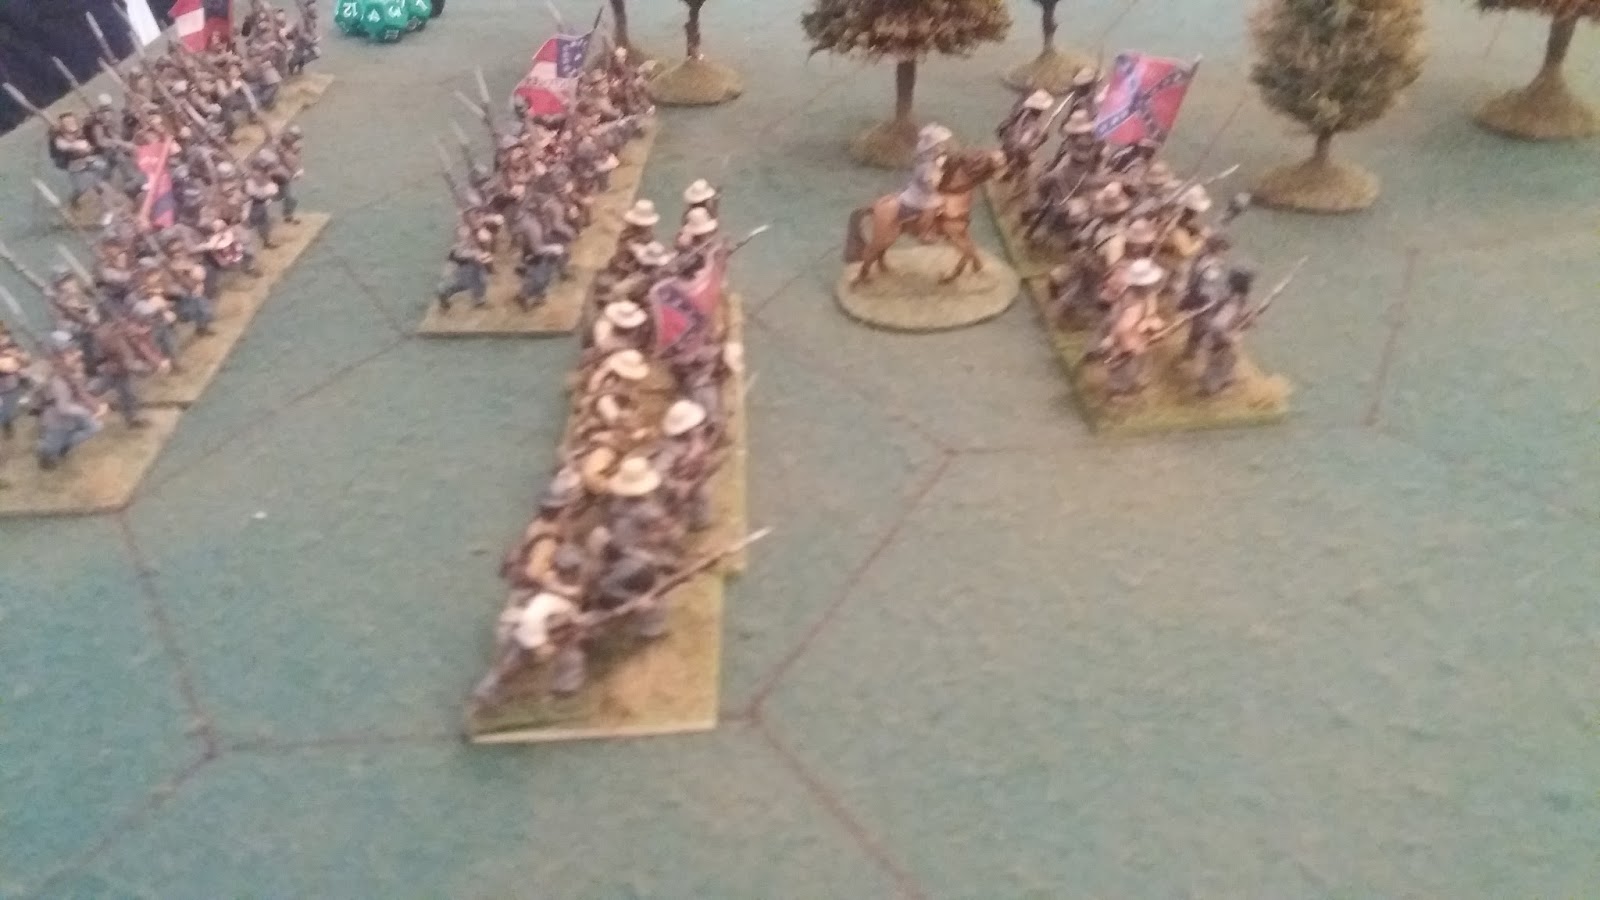
Enemy archers arrayed - Perry plastic figures

My heavy cavalry and general

Enemy archers and heavy foot/men at arms advancing against our centre

The centre of our line, comprising archers, billmen and foot knights/men at arms

Enemy heavy cavalry on our left wing, opposed by a unit of shire levy

The enemy centre advances under a storm of arrows from our archers, none of which had any significant effect!

My cavalry charges home against the enemy archers but is disordered by closing fire

The Burgundian crossbowmen and pikemen before they became engaged in ferocious hand to hand combat

My archers have another go at engaging the enemy units

The developing melee on our right wing - another enemy unit has joined the fray

An exchange of arrows in the centre of the field

The melee on our left wing continues

Enemy heavy knights charge the Burgundian crossbowmen

On our right wing, our cavalry moves forward to plug a gap in the line

A move later, and on my flank, two or three enemy units have disappeared, and my cavalry reserve is on the flank of the enemies line, whilst the Burgundian crossbowmen take a unit of enemy archers in the flank(apologies for the poor quality of this image!)

The combat in the centre of the field - in the foreground, the Burgundian Crossbowmen have defeated the men at arms and are advancing to hit a unit of archers in the flank, whilst their pike armed countrymen engage another enemy unit

Another move later and this is the position on our right wing - no enemy are in sight as the unit that had been facing off against the cavalry unit in the bottom right has just been flanked and defeated by the Burgundian crossbowmen

A general view of the combat in the centre of the field - a bit of a mess really!

The enemy heavy cavalry on our left wing advances

My cavalry moves from our right wing to start rolling up the enemy line with a flank attack

Two units of knights, both disordered, melee with each other - my Burgundian pikemen are to the right and about to add their weight to the melee

The shire levy archers not only stood against the cavalry charge, they managed to disorder them as they charged in with closing fire

A final view of the field at the conclusion of the game - approximately four hours but including a break of about an hour for dinner - a great way to end the working week!


