Sunday 23 September 2018

60th Regiment of Foot Partially Completed

When it came time to paint the remaining 8 riflemen, I decided NOT to complete the 3rd Battalion of the 95th, but instead to paint them up as the 60th Foot.

I have not quite got to the bottom of whether the 60th were actually a rifle regiment at the time of the Napoleonic Wars, including the War of 1812. I think that only one battalion (the 5th) was fully rifle armed, whilst in the other battalions, only the flank companies had the Baker rifle and the centre companies had a standard musket. Uniform data also shows the usual "swallows nest" distinctions for the flank companies, common in line regiments but absent in the 95th...

In any case, these four stand of the 60th are all rifle armed, so that probably makes them the 5th battalion by default!

I need to get command figures and a couple more riflemen to make the numbers up to a 6 base unit with two figures per base.


Tuesday 18 September 2018

War of 1812 - British 5th Regiment of Foot

I have completed the second unit of Perry Plastic 28mm Brits for the War of 1812 - this time I picked the 5th Foot. The images don't agree on the shade of green, so I went with the more subdued hue shown in a chart I downloaded from "somewhere". The facing colour is described as "Gosling" green in one of my reference books and I took this to mean a more natural shade of green, but who knows?

The command element is absent as I will need to obtain some figures - specifically an officer, as the set comes with two ensigns (only one of whom I have used so far) and a sergeant but only one officer and one drummer, both of whom are in the first battalion..... although I may get a musician as well as an officer as I don't think much of the idea of a battalion without a drummer!

First up is the reference picture and then following, four images of the painted figures - I added in a single mounted officer to the first three in place of the missing command element...


Sunday 16 September 2018

Palouse Wargaming Six Year Anniversary

In the unlikely event you are a visitor here who does not also follow Jonathan Freitag at Palouse Wargaming, please drop in to his blog and leave a comment - you can even mention you got the idea from reading this post if you like!

You can find Jonathan here :

http://palousewargamingjournal.blogspot.com/

Saturday 15 September 2018

To the Strongest Sicilian Normans v Byzantines

Last night we ended the week with a 15mm battle between a force of Sicilian Normans and a Byzantine army. The game was based on a real battle but I cant recall it now - basically it what is known in our group as "a line them up and charge" battle, which, although we wargamers often try to avoid, is actually what most battles were, at least until the advent of firearms!

We used "To the Strongest" rules - the Normans had four commanders all heroic and the Byzantines 3, all sub standard. the effect of this on play was that a unit with a commander in the same box could retake both an activation and a combat test for the Normans, but only the activation test for the Byzantines.

The Normans on average were better troops and had 18 coins in their morale store, whilst the Byzantines had 15. John and I were the Byzantines with Julian and Mark the Normans.


The initial layout of the two armies - Normans on the far side were the attackers


Byzantine heavy spearmen with regular archers ahead and a screen of light skirmishers covering the line


One of the many Byzantine units of light skirmisher archers


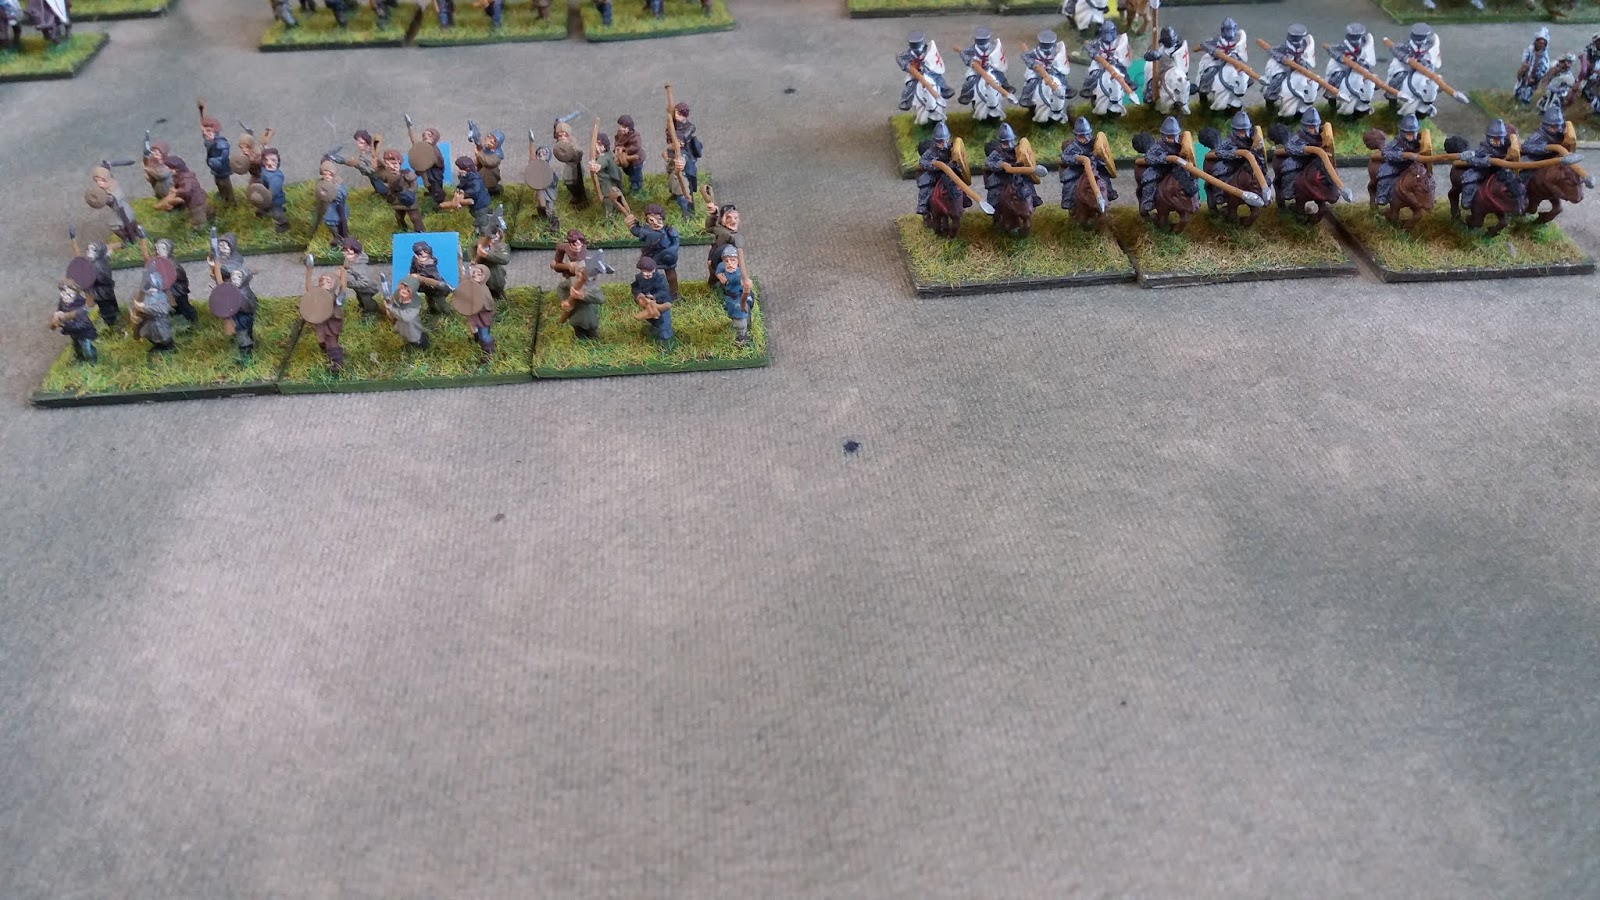
The Norman centre - two units of peasant levies alongside two units of heavy knights


The Norman commander surrounded by mounted knights and heavy dismounted men at arms


The Byzantine commander with the best of the Byzantine army


The Byzantine right prepares to meet the Norman advance


The Norman right (Julian) advances en masse against John


The Norman left (Mark) advances against my position


A scrappy melee quickly developed on my flank. The Normans destroyed one unit of skirmishers and we lost a coin....


A unit of knights in front of Johns position is disrupted by arrow fire


Johns heavy cavalry charged by Julian's Lombard's

Mark's Norman cavalry disrupted and attacked from three sides  by skirmishers and my heavy cavalry
The Normans attempted their usual trick of charging forwards with all the heavy cavalry units but this time, it did not go well for them - in this shot two of the three Norman units in sight are disrupted

On John's flank, the Lombard's continued to advance but the Byzantine line held firm


Compare this image with the one two above - two units of Norman heavy cavalry have departed the field - at this stage, the Normans had lost 3 or 4 units at 2 coins each, whilst we had still only lost the one unit of skirmishers....


One of my heavy cavalry units charged Marks remaining knights - an inconclusive combat left both units disrupted


The ongoing action on our left, another unit of Lombard cavalry attacked on three sides. Light units can only attack a flank or rear in these rules, but if they do, they get two card turns to inflict damage AND the target cant fight back!


Julian had a number of stunning card turning failures - this is one of them - a 1 for activation on both of his commands, so neither of them could do anything


The two commanders confront each other in the centre of the battlefield


Another lucky result for us - Julian activated a unit with his commander attached, turned a 1, had a second attempt ...and got another 1 - anything but a 1 would have activated the unit!


The junction of my two commands on the right flank - a significant portion of Mark's force was now absent and we had lost one more unit - so the coin count was around 12 to the Byzantines to 8 for the Normans


The quality of this image is poor but I left it in to show another example of Julian's card turning prowess - this time he activated with a pair of 10's, more or less guaranteeing that each unit could only take one action.


A lone unit of skirmishers holds out against two superior units of Normans


The Byzantine centre - the mounted unit in the upper right is the solitary surviving Norman unit in this shot


Roughly the same position in the next move - that Norman unit is now disrupted and being attacked from two sides - the Normans were down to 3 coins


The final nail in the Norman's coffin - John destroys the last unit of Lombard cavalry, taking the Norman coin count down to ZERO - whilst the Byzantines retained 11 coins!


A final view of the centre of the filed - many of the best Byzantine units in the centre bottom played no part in the action, having hardly moved since the Norman advance commenced a couple of hours previously.

A great game and an unexpected result - John in particular did very well against Julian's superior forces.

Tuesday 11 September 2018

28mm Warlord Waterloo British Colonel

Only the one figure tonight - this mounted officer by Warlord. He is one of a pair of mounted Colonels wearing the Belgic shako of the latter Napoleonic period. A very nice sculpt and I think he has turned out well.


Sunday 9 September 2018

2nd Battalion, 95th Regiment - Completed

These are 10 Warlord metal and two Perry plastic Napoleonic riflemen. I have another 7 or 8 remaining but will need to purchase an officer and bugler before I can complete the 3rd battalion (the 1st Battalion were painted twenty years ago and are from the matchless Front Rank range)

The figures are definitely a different style of sculpting but I quite like them painted up. The two Perry guys don't look too out of place, although they are the only ones stupid enough to be fighting in full marching order (they have their packs on) - must be battle casualty replacements!

I have done 8 shots from various angles.


Saturday 8 September 2018

First Warlord Napoleonic Rifleman Completed - Plunket's Shot

The pack of 14 metal Warlord British Riflemen are next on the painting table, and with their predominantly dark Green and Black colour scheme, they will probably not take so long to complete.

First up though, I painted one individual figure, whom I assume the sculptor has based on the famous story of Plunket's Shot from the Peninsula campaign.

A brief outline of this famous incident is reproduced below - I am sure I have read that an officer offered a bag of gold sovereigns to any rifleman who could shoot the French general concerned, although that part is not included in the story below.
"Thomas Plunket (1785–1839) was an Irish soldier in the British Army's 95th Rifles regiment. He served throughout the Peninsular War and later in the Waterloo Campaign of 1815 and is mainly remembered for a feat at the Battle of Cacabelos during Moore's retreat to Corunna in 1809. 
The French commander, a dashing and talented young general called Auguste-Marie-Francois Colbert, seeing the 28th Foot and six guns of the Royal Horse Artillery formed up on the ridge on the far side of the Cua, withdrew his men to be reformed. The British commander, Paget, also pulled his forces back, placing the 28th across the road on the far side with the 52nd and 95th formed up on either side in positions to pour flanking fire onto the bridge. It was this position that Colbert unwisely, and fatally, decided to assault. Forming his cavalry into a column of fours he charged for the bridge.

Seeing Colbert charging ahead of his men, distinctive because of his uniform and grey horse, Plunkett raced out of the line and onto the bridge. Throwing himself onto his back and resting his Baker Rifle on his crossed feet with the butt under his right shoulder in the approved manner, Plunkett fired at and killed Colbert. Before returning to his own lines he reloaded and shot down Colbert's aide-de-camp, Latour-Maubourg, who had rushed to the aid of the fallen general, which showed that the first shot had not been a fluke. Plunket only just made it back to his own lines before being charged down by a dozen cavalry troopers, but the deaths of the two officers were sufficient to throw the pending French attack into disarray.

The shots were "from a range that seemed extraordinary" to the men of the 95th Rifles, who were trained to shoot targets with a Baker Rifle at 180 metres and whose marksmanship was far better than the ordinary British soldiers who were armed with a Brown Bess musket and only trained to shoot into a body of men at 50 metres with volley fire"
Here is an image of the incident and below that the figure I have completed..


I am not sure what I am going to do with the figure or how he can be used in a game, but I am sure we will be able to work out a scenario where he gets to play a part - perhaps it will involve rolling a large number of 6's!