Sunday 28 February 2021

Great Northern War - Baby Steps

 As we are now officially back in a Level 3 Lockdown in Auckland for seven days, meaning people should stay in their own "bubble", only go out for exercise or food shopping and so on our planned multiplayer Carlist War game at Barry's today had to be abandoned. 

After cutting the grass etc, I had most of the day available to get some work done on the painting table, so have finally managed to get some work done on the plastic GNW cavalry. To get started, I decided just to paint a generic regiment, in blue coats, faced yellow, as most of the Swedes from this era seem to have been attired.

Its only the first squadron (I am basing them in squadrons of 3 on 60mm x 60mm bases, as that is what Nick has done with his Beneath the Lilly Banners armies) and I think they have come out quite nicely


Yesterday, before the imposition of the lockdown, I was able to pick these two books up from the local library, ordered in from elsewhere within Auckland via their online booking and request page.


The MAA title is pretty light on anything other than brief pen sketches of the various armies involved, plus some colour plates - useful stuff but not very in depth or detailed. It really feels like the Great Northern War could have justified two or three volumes - The Swedish Army, the Russian army, and the armies of the lesser states.

The rather weighty book about the Swedish King, Charles XII, is a rather different matter and may give me a bit TOO much information - but I am happy to give it a go!

Saturday 27 February 2021

Friday Night Game - To the Strongest Reconquista

 Last night after work I joined Andrew and Julian for a game of TtS, using Andalusian Moor and Spanish/Norman figures from Julian's collection. many if not all of which were painted by Andrew a decade or more ago.

Julian had put together a scratch scenario that doubtless appears in many of the classic wargaming tomes - the Castilians were in a column of march along one edge of the table, in the process of crossing a river, when an enemy ambush appeared on their flank. The river was negotiable in its entire length, but was a "difficult activation" and troops could only move at one square per operation. We counted the units and divided by three to get our army morale coin total - Julian had 48 = 16 coins, we had 65 = 22 coins. Julian's force was smaller but of better quality.


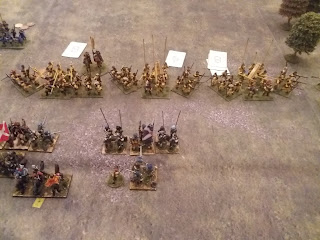
A rather poor image of the battle field - Spanish on the left heading away from the camera - Andrew commanded the Moors right flank - farthest from camera, whilst I took the centre and left -this side of the river.


Spanish knights advancing - Old Glory Normans I think


Moorish skirmishers armed with javelins


Early in the game I redeployed half of the left flank across the river to join the centre


Andrew got some good activation cards and pelted across the table, almost catching the van guard in the flank...unfortunately, when this shot was taken, he had come to the end of his activations...


The column of Spanish heavy infantry and bowmen with their attackers just visible to the left - they were certainly feeling a little nervous at this point!


Meanwhile on my flank, Spanish knights charged my light infantry skirmishers


I had left three light units on the left flank and advanced with the "Black Guard" in the centre


On our right, Andrews initial charge had been repelled and the Spanish brought the battle to his infantry


My sole cavalry unit (note, Julian needs more Moorish cavalry, especially horse archers!). They charged heavy infantry defending a wood - why? Seemed like a good idea at the time - but of course, they were disordered and repulsed!

At this point, we broke for dinner, so here is a quick interlude of travel images from last weekends trip


Artistically fashioned buildings in Tirau, which is quite famous for its corrugated iron sculpture work 


Rotorua - WW1 memorial to soldiers of the Arawa Tribe (Iwi) surmounted by a rather diminutive King Edward VII


A WW1 artillery piece - I dont know what it is, but I am sure many of you do!


The Bathhouse which was funded by the NZ Government and was its very first organised effort at encouraging tourism


Another bath house adjacent to the previous building


The statue of Sgt Fred W Wylie stands proudly in the Government Gardens with the Museum in the background. He was a brave soldier who fought in the Boer War with the 4th New Zealand Contingent. He was killed in action at the young age of 25. On the back of the statue there is a inscription HE WAS BRAVE AS A LION

And now - as Julian always says when we have finished eating - "Back to the war!"


Julian advanced with his knights up the river and launched an assault against Andrews bowmen


Meanwhile, on my flank, the light infantry had destroyed one unit of Spanish knights and driven off a second - impressive work!


The central mass of the Spanish army, numerous units of good quality heavy infantry spearmen, move up to cross the river and engage the Moors


Julian requested I take this image! We remembered (for the first time in TtS) to do the morale tests for all adjacent units, when any unit was killed. Here, a Black Guard unit has popped in the bend of the river, and I also had the archers in the woods disappear, plus the archers in the bottom shaken - we lost 3 coins in one hit!


The game got a bit hectic at this point and I didn't take many more images. From the time of the previous image, when we had a comfortable lead of 14 coins to 6, Julian gradually whittled us down until we got to 6-3 The final turn saw me kill a unit which caused the morale testing for the units nearby, and one of the lights also popped, thus taking care of the Spaniards last 3 morale coins - we still had 5 - a close run thing indeed!

Above and below are two shots of how the table looked at the conclusion of the game - quite a lot of empty spaces where troops used to be!


A great game and kept us going till after 10pm -I had to apologise for getting a bit emotional at some points - turning cards seems to be just as fraught as rolling dice! The number of times you turn over a 10 when you want a 1 is amazing - and extra frustrating when the 10 would have been the perfect card on the previous turn!

Wednesday 24 February 2021

A New Project - Great Northern War Swedes

 My gaming buddy Nick has finally cajoled me into parting with some cash to invest in a bunch of Great Northern War Swedish infantry from the beautiful Ebor range. Regular readers will know that Nick and I have had a couple of games using Barry Hiltons Beneath the Lilly Banners late 17th/early 18th century rules - as has our mate Mark from 1866 and All That.  

These have proved to give a very enjoyable game, and in addition to 6 x 18 man infantry regiments, I have also purchased two packs of marching pike men, who will be painted in three lots of four to add to a few of my existing WSS regiments, to make them usable in the slightly earlier period. Just for fun, I also have the Swedish Mounted Command pack coming from Nick Wragg of Ebor.

In the meantime, I locally sourced two packs of ex Wargames Factory (now Warlord) hard plastic cavalry. The small on line business in Kapiti, just north of our capital city Wellington, only had one box each of the cavalry of the Sun King and cavalry of the Grand alliance - however, having bought the figures in their previous incarnation as generic War of Spanish Succession cavalry, I suspected the only difference between the packs was the artwork on the box and a small insert with some flags - and this proved to be the case.

So, while I await the arrival of my metal infantry from the north of England, and hope the value does not attract the attention of our Revenue Officers at the border, I have two dozen plastic cavalry to keep me busy....on top of the twenty odd Border Reivers from TAG, and around 120 War of 1812 Old Glory I have to paint for our "group" - I am starting to feel like a proper wargamer with mounds of unpainted figures!


And now I have tricked you into looking at my blog with one image of toy soldiers, here are a few more photos from day one of my wife and my weekend away walking around the Rotorua area of the central North Island!

 
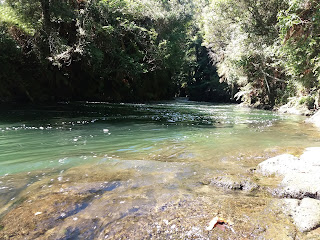
Day One Walk One - very scenic water falls and river at Okere Falls


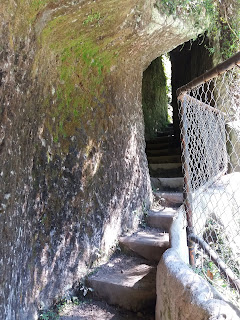
The path down to some caves at the bottom of the falls - a nearby sign indicated the use of the caves was unknown but it is speculated non combatants sheltered there during periods of tribal warfare, lowering themselves down on ropes


Looking out from inside the largest of the caves


This isn't a reason to close the gate that you see every day, even in New Zealand!


Day One, Walk Two - Redwoods Forest park, Rotorua


On a previous trip, our whole family visited this aerial walkway through the redwoods, so this time, we didnt bother doing it a second time.


Between walk two and three, we checked into out motel, which included this hot pool fed from one of the many natural thermal springs that dot the Rotorua area


Day One, Walk Three Lake Rotoehu between Rotorua and Whakatane. The path we followed is known as Hongi's Track after a Maori War chief who had his men carry their waka (war canoes) along it between one lake and another, so he could launch an assault on an neighbouring tribe(see Google/Wikipedia for more info!)


The "Wishing Tree" in the middle of the forest route to the lake.


We did of course spend most of our time walking through beautiful lush New Zealand bush, but I think I have probably posted more than enough images of ferns and trees, so I have left those details out on this occasion! Total distance walked on day one was around 18km. Evening was spent in the hot tub, with a cold beer and a good book - a pretty good way to recover from the days exertions.

Saturday 20 February 2021

Friday Night Game - For King and Parliament

 Welcome - normal service has been resumed! After a snap three day level 3 lockdown in Auckland, we were all happy to hear the government announce on Wednesday that we would drop to level 2 with the rest of the country going to level 1 - meaning Julian's proposed Friday night game was back on again - hurrah! Unfortunately for a variety of reasons, the rest of the usual suspects were unavailable to attend, so it ended up just being Julian and myself

We fought a scenario from one of Julian's collection of rule/scenario books - its a fictitious battle apparently based on the classic BBC Radio series "The Archers"....I dont know because even I am not old enough to have listed to drama on the wireless - I think thats more a 50's and 60's thing! (1950's that is , not age group).

We remembered some rules that we have previously forgotten in the heat of battle (mainly because we have played TtF so often and these rules slightly resemble them, although they have MANY more nuances) The morale test when adjacent units are destroyed was particularly helpful to me!


The battle plan - I was the "Royalists" on the bottom of the map


View of the table before I had deployed


View from Julian's side after I had spent half an hour pulling troops from five different boxes!


My overall commander - despite the fact I was nominally Royalist and Julian Parliamentarian, the actual forces deployed were Covenanters on my side and TYW Swedes on Julian's - obviously some falling out over an arcane area of Calvinist theology!


I was outnumbered in cavalry but theoretically had an advantage if charging - so I did on the left flank


Well that didnt go so well - one unit destroyed and another retired disordered - 3 coins gone from my army morale!


On the other (right) flank, my smaller cavalry units moved forward to engage Julian.


This cavalry met with more success - I had one less unit but was able to concentrate them more quickly than Julian, so had a three to two advantage in the first action


On the other flank, unhindered by my one remaining unit, Julian's four cavalry units charged forwards, but after several moves were destroyed or driven back by my gallant dragoons and commanded shot! ( coins off Julian's army morale.


The next four shots are how the right wing cavalry tussle developed


Stands turned at 90 deg indicate disrupted. My units could sustain two hits, Julian's could take three - but it did not save him. In one fight, I had five cards and got four hits, Julian needed to save three - which he didnt - minus another three coins mate!


Having destroyed the cavalry, this unit charged a disordered dismounted dragoon unit - and were defeated! Another three coins off my pile.


But I also managed to wipe out this unit - Julian's four cavalry brigade was reduced to a sole survivor


As mentioned, on the other flank, withering musketry removed another two cavalry units with the one remaining (at left by hedge) pulling back to reorganise


The mas yellow brigade of four pike and shot units advanced in the centre - whoops, here we go I thought....but some good shooting managed to disorder a couple of them


We traded fire for a couple of turns, I had two disordered units and Julian I think had three


And then all of a sudden, one unit popped and another disappeared after failing a morale test - and all Julian's coins were gone, whilst I still had about ten