Annual Wargaming Trip - Day 3
Our third day at Lake Tarawera started around 7am with ablutions, and was quickly followed by our usual high fat, high cholesterol breakfast of fried bacon eggs mushrooms and tomato!
The game commenced around 0930 and what a treat today - Mark had devised a WW1 in E Africa scenario involving three separate game tables to cover multiple actions around Lake Victoria in 1915.
I have pinched the above map from Marks "1866 and all That" blog!
The three tables represented the British HQ at Kisumu - which must be held at all costs - a German wireless station at Bukoba that is vital to their war effort, and the German HQ at Shirati.
The night before, whilst most of us once again over indulged in alcoholic beverages of various types,
our esteemed commanders - Rick for the Empire and Paul for the beastly Hun - played a small board game Mark had devised to work out our pre game moves. The result of these activities were as follows:
I had advanced overnight through the jungle with 6 companies of Kings African Rifles (KAR), two HMG's and a mountain gun, arriving just before dawn at Shirati.
Chris had landed 3 battalions of Brits and an HMG plus a unit of Frontiersmen at Bukoba, to assault the wireless station, aided by naval gunfire support from the ships pompom gun and our C in C Rick remained at Kisumu with 3 battalions of Sikh infantry, 4 HMG's and a field gun.
Meanwhile, Hauptmann Paul had assigned both Barry and John to defend Bukoba with a unit of sailors, two mountain guns, three companies of Schutztruppen and three HMG's in trenches, whilst he took simultaneous command of two companies and an HMG at Shirati AND the main assault force on Kisumu, comprising two mountain guns, several HMG's and 6 battalions of Askari and Schutztruppen.
My game was quite quickly resolved after I realized that the intelligence briefing I had received to the effect that Paul's forces might be caught in column of route as day broke at Shirati was wildly optimistic and in fact, all that I had to oppose my 6 companies plus support was one HMG in the house and a couple of companies of infantry. After several rounds of pretty ineffectual fire exchanged between the opposing forces - mainly because Paul's guys were behind a stone wall or inside a building and saved hits on anything but a 1 and my chaps had gone to ground in the cover of a native village and a banana plantation - the Germans had a sudden rush of blood to the head, quit their safe position, leapt over the wall and charged downhill against my leading company of KAR who were defending cover AND supported by an HMG - the result of this rash move may well be imagined!
At this point it was obvious my force was excessively strong for the mission it was expected to carry out, so one HMG and three companies of KAR were dispatched back to Kisumu to assist the Sikhs.
Our action at Shirati lasted a couple more moves but the end was nigh - one company charged the house and wiped out the MG there, then the last company of infantry was brought to battle and defeated. One KAR company was lost in the action, but the remaining two were able to put the German HQ to the torch!
Meanwhile at Bukoba, despite being outnumbered by the defenders, Chris's Brits were doing a sterling job. The Navy engaged their opposite numbers in the Kriegsmarine in the local fort, whilst the three companies of regular infantry managed to overcome John's defending Germans on the hilltop, despite three HMG's and a system of defensive trench works - simply outstanding! The navy gun boat took a lot of damage from Barry's two mountain guns but stuck to their work, raining down pompom fire on the little fort. The Brits finally broke through and demolished the wireless tower and set the radio shack alight. In the withdrawal, they lost about half their number, but those who remained will be telling the story of their days work every Remembrance Sunday/ANZAC Day for the next 50 or 60 years!
On the third table, Rick had his work cut out for him as the majority of the German forces emerged from the jungle, accompanied by a significant amount of supporting firepower. As always, Paul deployed his forces with skill and pursued his assaults with aggression, and the Sikh defence began to crumble. At least one unit quit the field early, and others were pushed back from the outer defences closer and closer to the town. Rick's luck was summed up when a fresh Sikh battalion was able to charge one of Paul's Askari units in the flank - yet were still beaten off and forced to retire! Fortunately, because we had found Shirati so lightly defended, my KAR and HMG arrived back at the most opportune moment and although they played no active part in the outcome, their mere presence forced the Germans to retire after having fired Piggots store, a minor achievement for them.
So the game of three games came to an end in the early evening of our third day and the conclusion was overwhelming victory for the British! Following are pictures of the days events:
The phenomenal hand made gun boat provide by our game host Mark
Dawn breaks at Bukuba - the British assault force has landed and the gunboat steams into view to commence its bombardment of the shore
The object of the assault on Bukoba - the wireless station on the hill overlooking the German fort
The German HQ at Shirati with the defenders in view
The fort at Bukoba, occupied by Kriegsmarine sailors
A bot of psyops - I put this nice little Old Glory model out with my forces to scare the Germans - but it was not actually allowed in the scenario - boo!
The KAR deploy as they arrive at Shirati as dawn breaks
Two of the Sikh companies deployed in defence of the British HQ at Kisumu - the Askaris can be seen emerging from Marks scratch built jungle
The British field gun was also part of the defending force
And here come the enemy to misquote C/Sgt Bourne in the film "Zulu"...."The sentries report Askaris to the South West sir...Thousands of 'em"!
Meanwhile at Bukoba, the plucky Brits have wiped out half of the defending Germans and are closing in on the vital wireless tower
The view from the German lines at Shirati. Not long after this shot was taken, the unit to the left unaccountably vaulted the wall and charged down the hill in a valiant but suicidal bayonet attack on an entrenched company supported by an HMG!
Sikh defenders at Kisumu
The German artillery supports the Askari assault at Kisumu
The KAR assault the German HQ at Shirati with a bayonet charge
The last remaining German unit at Shirati confronts a second KAR company as the third company circles round from the other flank.
View from the KAR lines as they psych themselves up to charge....
Success at Bukoba! The wireless tower has been demolished by the British infantry
Meanwhile at Kisumu, the Germans have the Sikh defenders on the ropes and are moving in for the kill
Askari HMG team supporting the assault on Kisumu
But the cavalry arrive in the nick of time! My three companies of KAR and an HMG emerge from the jungle, having completed their forced march back from Shirati.
The partial success of the German assault on the British HQ - Piggots store in flames as the Askari beat a hasty retreat into the jungle
What a great game, enhanced by Marks stunning hand built scenery, buildings and models. Figures are all Brigade Games and were contributed by John, Rick, Barry, Mark and myself - with the exception of the RN crew who are Pulp figures from Canada, and the Frontiersmen, who are my Old Glory Mounted Infantry in slouch hats!
Game Four tomorrow night - and its another visual stunner - Spanish Civil War using Empress figures, all collected and painted by Rick, who also designed the scenario.
Monday, 16 October 2017
Annual Wargaming Trip 2017 - Part 2
Day Two saw us change period to Napoleonic. Chris had devised a scenario set in 1812 where an Austrian army was pursuing the Russians, who were making for three bridges at the far end of our 3m table to make their escape. There were two Russian players - Mark and Paul - and four Austrians - John, Barry, Rick and me. I commanded the main pursuing force , John had a small (concealed) blocking force at the far end of the table, between the Russians and the river, whilst Barry and Rick commanded flanking Austrian forces. Chris had devised a system to simulate the potential contact between the off table Austrians and the off table Russians. If the Austrians succeeded in engaging the Russians, it delayed their arrival on the actual table by another move. Mark commanded both off table Russian forces and Paul commanded the force that started on the base line at the opposite end of the table from the river and bridges. As soon as Paul had moved any of his units over 400mm from the table edge, I could come on at that point with any Austrian troops I wished.
Paul duly haired off across the table, leaving a couple of units of infantry in square about 500mm in and a light cavalry regiment on each flank to slow my infantry pursuit. I brought on my own two regiments of hussars on my right flank and followed this up with a battery of artillery and six battalions of infantry. My first success was firing grape shot into one of Paul's squares, which disintegrated under the weight of shot and quit the game on move three. Next up, after a bit of prevarication, my leading hussar regiment charged Paul's cavalry and won the encounter, again driving the unit from the field. On the other flank, however, I did not have any guns or cavalry to support my other six battalions of infantry, and as a consequence, they held back for several moves until Paul was forced to withdraw the covering cavalry as they became too isolated from the rest of his forces.
Meanwhile Mark had arrived on both sides of the table about half way down. Barry and Rick continued their flank marches off table for a bit longer although eventually Rick decided to come on with his infantry at the same point Mark's Russians had entered. Mark meantime had rolled two or three great activation rolls and his forces streamed onto the table at time and a half movement - with his cavalry in column on a road, this equated to an initial move of 1200mm! However, his leading cavalry received a rude shock when they approached a walled farmyard and were fired on by John's concealed Jaegers!
On the other flank, Mark left two battalions very close to his entry point, thus preventing Barry from arriving under the 400mm proximity rule. Barry therefore continued the flank march with his entire force, arriving at Johns gun line on the heights ahead of the Russians, well before Mark's force did so.
Finally, Rick arrived at the rear of John's forces on the other flank with his four regiments of heavy cavalry.
From this point on, a steady slog ensued in which my leading hussar regiment managed to charge down the road in column, catching one battalion of Marks Russians in the rear, then breaking through onto a gun battery, destroying both. Unfortunately, having shot their bolt, they were then isolated in the middle of Marks forces and suffered massive casualties from combined musketry and grapeshot. The casualties were not quite enough for them to quit the field though - unfortunately, in this case - because instead, they retired away from their attackers, which in this case did not take them back whence they had come but rather pushed them forward in front of Marks position, up the hill and right through John and Barry's grand battery, masking half of them for one turn then disrupting them as they poured through to the safety of the ground to the gunners rear!
On the other flank, I had the same luck with activation throws as Mark had, and in three moves had closed the big gap Paul had opened up as he withdrew covered by that cavalry regiment. Three battalions went into line behind the said cavalry and raked them with shot, causing a morale failure and their disappearance from the field.
Paul and Mark executed a number of devastating infantry assaults on Rick's infantry battalions, causing one or two to break and flee. The third assault by Paul's elite grenadiers was beaten off, and the Russian rearguard attempted to disengage to continue their retreat to the river.
Barry and John's huge gun battery wreaked havoc on the infantry to their front but my second hussar regiment was unable to replicate the heroics of their illustrious colleagues as Mark maintained a battalion in square in the woods, preventing them from getting at the rear of his forward troops. On the other flank, Rick struggled to find a useful task for his cavalry and resorted to piecemeal charges against infantry units in column or square, none of which came out well for the Austrians - surprise, surprise!
Rick and I combined in an infantry assault which succeeded in smashing one battalion of Paul's rearguard and then my unit broke through onto a battery and destroyed that too. Unfortunately this left them in front of a walled farm occupied by another Russian battalion and in the next move, they received the good news in spades from these boys. Rick's battalion also broke through but onto a fresh unit behind a wall and suffered accordingly.
At this point however, things looked very rosey for the Austrian cause, but in the final three or four moves of the game, Mark managed to overwhelm Rick's cavalry on the left flank of the Russian withdrawal, opening a route to one of the bridges, whilst on the other flank, a series of desperate infantry charges by Mark and the leading units of Paul's force, threw back John and Barry's units in some confusion although the gunners held their nerve and continued to service their guns.
We called the game at this point - I thought it was a draw or perhaps a minor Russian victory, whereas Mark thought it was an Austrian victory as he doubted many Russians would have been able to get away across the bridges, despite the success they had in the last few moves of the game. The main thing however was that we all had a very enjoyable day and owe Chris a big vote of thanks for a fascinating and complex scenario that kept us on our toes for 6 - 7 hours!
Here are the images from game number two:
A couple of moves later and my leading hussar regiment has destroyed one of Paul's cavalry units
Marks Russians arrive on the table and deploy their guns
John's blocking force man their guns in front of Marks right flank force emerging from the woods
Ricks left flanking infantry enter the table behind Mark
Marks Russians advance on the left
Paul's Russian force continues to stream towards the centre of the table
My Austrian pursuit on the left finally gets underway as Paul's cavalry covering force retires
The Austrian C in C and his ADC
Barry's right flank force arrives en masse behind the gun position at the far end of the table
Rick's cavalry force arrives in the equivalent position on the other flank
Marks Russians continue to press forward in the centre
My heroic hussars in the position they ended up after rear ending a Russian battery and infantry battalion - the huge Austrian gun battery they inconvenienced by retreating was just out of view in the bottom left of this shot
A traffic jam of retiring Russian units in the centre of the table - Paul's assault on Rick can be seen developing in the top left corner
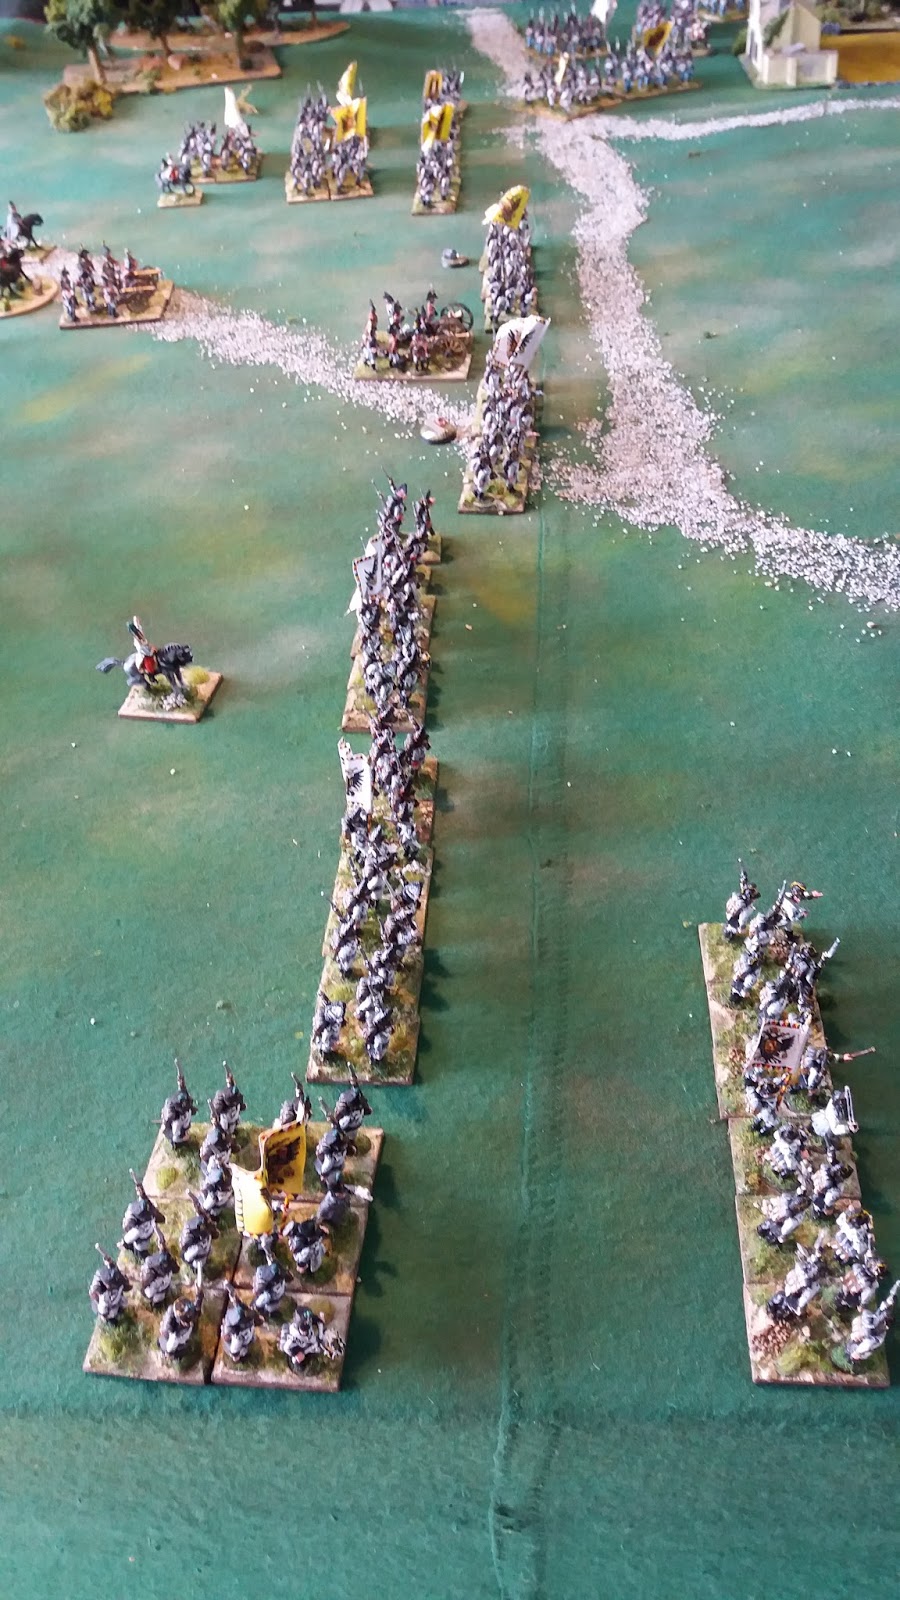
My twelve battalions of infantry deployed in line to pursue - Rick infantry are in the far centre
The ending position of the combined assault by Rick and my infantry battalions - the battery I broke onto and destroyed had been deployed right in front of the gate to the farm
The massed assault on the grand battery position as the game came to an end. The gunners held out but several infantry battalions to their right were roughly handled and driven back by the Russian assault.
The figures in this game are from a variety of sources. Most of the Austrians are mine, the infantry mostly Sash & Sabre, with support from some Old Glory, both first and second editions. Cavalry also a mix of Sash & Sabre and Old Glory, as are the artillery. Marks Russian force were also his own figures - a mixture of plastics infantry and metal cavalry and guns - all Perry I think. Paul's Russian force was all Minifigs that have been in the group collection for 30 years or longer.
We then retired to the house to quaff wine, beer and Calvados, eat far too much rich food and watch military related DVD's till the wee small hours of day three in front of a blazing log fire - this is how life should be every day!
Sunday, 15 October 2017
Annual Wargaming Trip 2017 - Part 1
As reported last year, I am lucky enough to be part of a group of gamers hosted by our good friend John at his home overlooking the stunning Lake Tarawera in the central North Island every 12 months or so. We all take 3 or 4 days off work and spend Tuesday to Sunday at the house, with all day games on weds Thurs Fri and Sat and a half day game on Sunday. The evenings are filled with a log fire, beer, wine and champagne (not to mention Calvados!) and huge meals - Bouef Bourgignon, Lamb rack, whole fillet of beet etc....certainly a highlight of our gaming year! Each day we have a completely different game, with one or more of the attendees providing a scenario - often a new project - involving figures that most of us have in our collections.
This year, we had English Civil War, Napoleonic, WW1 in East Africa, Spanish Civil War (a new period) and a small Napoleonic skirmish with a twist for the half day game on Sunday. In this post, I will briefly cover the first days battle, an English Civil War confrontation.
The two sides were lined up facing each other with a simple mission - to make base contact with the opponents baggage train, represented on the table by several model carts to the rear of each army. The first side to achieve this would be the winner - or the secondary method of gaining victory would be through attrition of the enemy forces.
Rick, Mark and I commanded the Parliament forces, with John, Barry and Chris the Royalists - Paul designed the scenario and ran the game as umpire.
There was river on our left flank with a church in the far corner on the Royalist side of the table. Rick decided this must have some strategic value and set several units from his left wing command haring over the bridge to secure it. Mean while, I stood firm In the centre and Mark deployed his forces on the heights on our right wing, with the baggage train to his rear.
John (opposing Rick) and Chris (opposing Mark) both advanced - John moved a unit into the church Rick was heading towards, whilst Chris made a general advance with his entire force. Rick managed to get his force into by far the most dominant position and looked to have John in the palm of his hand, but a series of bad dice roles, countered by exceptionally good ones from John, undid all Ricks good work - one unit of Johns cavalry led a charmed life and managed to push back three cavalry regiments of Ricks, plus wipe out a gun. Then, when Rick charged a properly formed foot unit into an opposing unit in a horse-resistant "hedgehog" formation, he somehow contrived to loose that combat too!
On the other flank, things were equally dismal for our cause. Chris advanced rapidly with a motley band of Scots and Irish foot, plus a couple of unit of regular foot and some cavalry towards the centre (the right of his left wing command). The clansmen were a one shot weapon - bloody useless in most instances but virtually unstoppable in a charge! This they dually executed and destroyed one of Chris's units. The cavalry in the centre confronted Marks horsemen and after losing the initial contest, overcame and routed our units, opening a direct route to the baggage train. After a couple of moves where the initiative roles went against us at critical times, Chris made it through to our baggage line and won the game as per the scenario.
However, it was only just lunchtime at this point, so we all agreed to carry on the game after lunch.
There is no happy tale of redemption or a moral victory for Parliament, unfortunately! Chris continued to rough up Marks force, and although he had one or two reversals, he wiped out our entire right wing by the mid afternoon and started to turn in on the flank of my Covenanters in our centre.
Ricks bad luck and Johns good continued as per the morning session. Barry and I maneuvered around each other and I think I had slightly the better of it, but I lost one unit of cavalry to John and had the other one pushed back after losing a melee. All in all, it was a very bad day for Cromwell's men - he was not present - maybe that was the problem?!
Following are the images I capture of the action. The figures are a great variety from Front Rank, Foundry and Renegade to 28mm plastic by Warlord, some painted 25 years ago and others completed only a few weeks before the game
Ricks left flank of the Parliamentarian army
Marks left wing on our side
Ricks forces advance towards the strategically important church on the Royalist right rear table edge
Chris's Scots advance towards Mark
Mark deploys his dragoons to face the Scots
Two of Marks pike blocks with musketeers detached in a forward skirmish line
The position on the Parliamentarian left wing under Ricks command
The result of the clash between the ferocious Highland charge and the Parliamentarian dragoons - the dragoons are no more!
Chris and Marks cavalry clash in the first charge of the game
The general advance against Mark on the Parliamentarian right wing
Barry's Royalist centre advance - the cavalry in column very shortly disappeared due to gun fire
My two units of cavalry supporting Rick's advance on the left wing
Another charge on Marks right wing forces
The action in the centre - the yellow coated Royalist cavalry facing off a Covenanter "hedgehog" were decimated by musketry and quit the field soon after this shot
The end is nigh on Parliaments right wing - Mark only retains two units of foot
The result of dice rolling - two units of Rick's cavalry fleeing the single Royalist cavlary regiment that opposed them
The action in the centre - my Covenanters still in good shape and about to inflict some damage on Barry
Top left - Rick's orange coated infantry regiment charges a "hedgehog" but despite all the advantages, contrived to loose and be pushed back!
Final shot on Marks wing - one unit left and its about to be eradicated. The game ended around 4pm and we retired to the house to watch DVD's, drink wine and lick our wounds!
Day two to follow tomorrow.......
Subscribe to:
Posts (Atom)