Sunday Game - War of the Spanish Succession
Its about three years sine we last played this period, so it was about time we got the boys in lace cuffs out of storage - unfortunately for me, my Dutch and Danish troops were not required for Ricks scenario, so my contribution in terms of figures was minimal - more of that anon!
As mentioned, Rick created a scenario for this period and nominated Chris to command the Allied (British/Dutch/Austrian) army, whilst Barry commanded the French/Spanish/Bavarian opposition. Rick had requested both commanders to make a plan of deployment ahead of time using this map, and also to assign each command a specific task - Rick commanded the Allied cavalry, I commanded the Austrians and Chris the British, whilst on the other side, Paul had all the cavalry, Mark his Bavarians and Barry the French and Spanish.
Chris made a simple plan that is shown below. The Brits would advance on our right flank and engage anyone they met, then turn inwards to the centre. My Austrians would traverse the field diagonally to assault the main heights in the centre of the enemy position, and Rick would bring our cavalry on to our left wing on game turn three and advance on the same central point in the enemy line as I was heading for. (note the name Rick gave to the farm slightly to the right of the top centre of the plan)
Chris had expected the enemy to make full use of the excellent defensive position on their left (opposite his British force) but as it happened, this area was empty! However as we had written orders to follow, his huge force of slow moving unwieldy British lines spent the vast majority of the game on a pleasant stroll through the Dutch countryside, occasionally stopping to remark upon the beauty of the view, or to picnic on the verdant pastures. Meanwhile, the Austrian and Dutch infantry in the centre had to do most of the work! Ricks cavalry assisted although they had limited success - their main achievement was to actually get two units right up to the position required by Chris's plan, and wipe out Barry's battery of four guns that had wrought carnage on my infantry all day long - yay for the Cav! The Brits eventually arrived in the late afternoon, by which point I had two battalions of eight left, both the Allied and Enemy cavalry had all quit the field, and the French were down to three battalions of their original force. Only the Bavarians on the right - as far as it was possible to be from the British - still represented a cohesive fighting force.
Now for the pictures......
The initial British deployment on the Allied left
The Bavarian and Spanish on the right, with the French in the centre on the other side of Merdorf
The French grand battery in the centre that was the target of both my Dutch/Austrian force and all Ricks cavalry
The initial deployment of my force in our centre - a bit of a traffic jam around Offus
I had noticed that the farm where Ricks cavalry were to deploy was called Merkles Farm - so I brought along Meghan, the farmers daughter, to cheer us on. She is even dressed in patriotic Dutch colours!
The British juggernaut commences its leisurely parambulation of the Dutch countryside.....
Meanwhile, in the centre, the French look down from the heights of Merdorf Rise
And the nasty gunners line up on my poor little Austrians
Meanwhile, the country ramble continues for the redocoats
The first French infantry brigade marcheed off the hill to confront the advancing Austrians
And on the other flank, a tidal wave of Bavarian blue advances unoppossed
But in the nick of time, Rick appears with the cavalry to secure my left flank...for now.
The Allied cavalry trot past Merkles farm, bidding Good Morning to the lovely Meghan
The Austrian battery - not quite as grand as the French one - fires in support of their advancing infantry
The Allied cavalry edges forward to engage with the Bavarian infantry
In the centre, the Austrian and French infantry clash, and in a matter of minutes, three battalions of French turn and flee. The Austrian battalion on the right here with the yellow and black flag pursued and destroyed two of the retreating French. But in the top right, the French and Spanish cavalry move forward.....
The same view from the French side of the table - things were looking good for my force at this stage
The Austrians combine their firepower against another French battalion which also soon quit the field
All bar the top centre infantry unit here are Austrians - three out of four French units in the first brigade have been destroyed
The left wing of my advance - Dutch guards advance in line against the second French brigade
The French cavalry advance and caricole against one of my battalions - where are the British?!
Oh, there they are - well some of them at least. the other Brigade is still picnicking!
Meanwhile, the Bavarians are dealing to Ricks cavalry with sustained musketry
Some cavalry moved up to support my guards - but then charged ahead and became involved in a melee with the French infantry that they eventually lost
The Bavarians having knocked back half the Allied cavalry, manouvre to tidy their lines. BUT, two units of Ricks cavalry have found a gap between the Bavarians and French and are now between Merdorf and the heights where the grand battery sits.
In blissful ignorance, the French gunners continue to pour fire into our lines
By this stage I had lost two battalions of Austrians to the French cavalry, but I finally had some support from the British on my right
The Allied cavalry retire in disarray before the weight of Bavarian fire
But their colleagues have made it to Merdorf Rise, and have already slaughtered two of the gun crews - HURRAH!
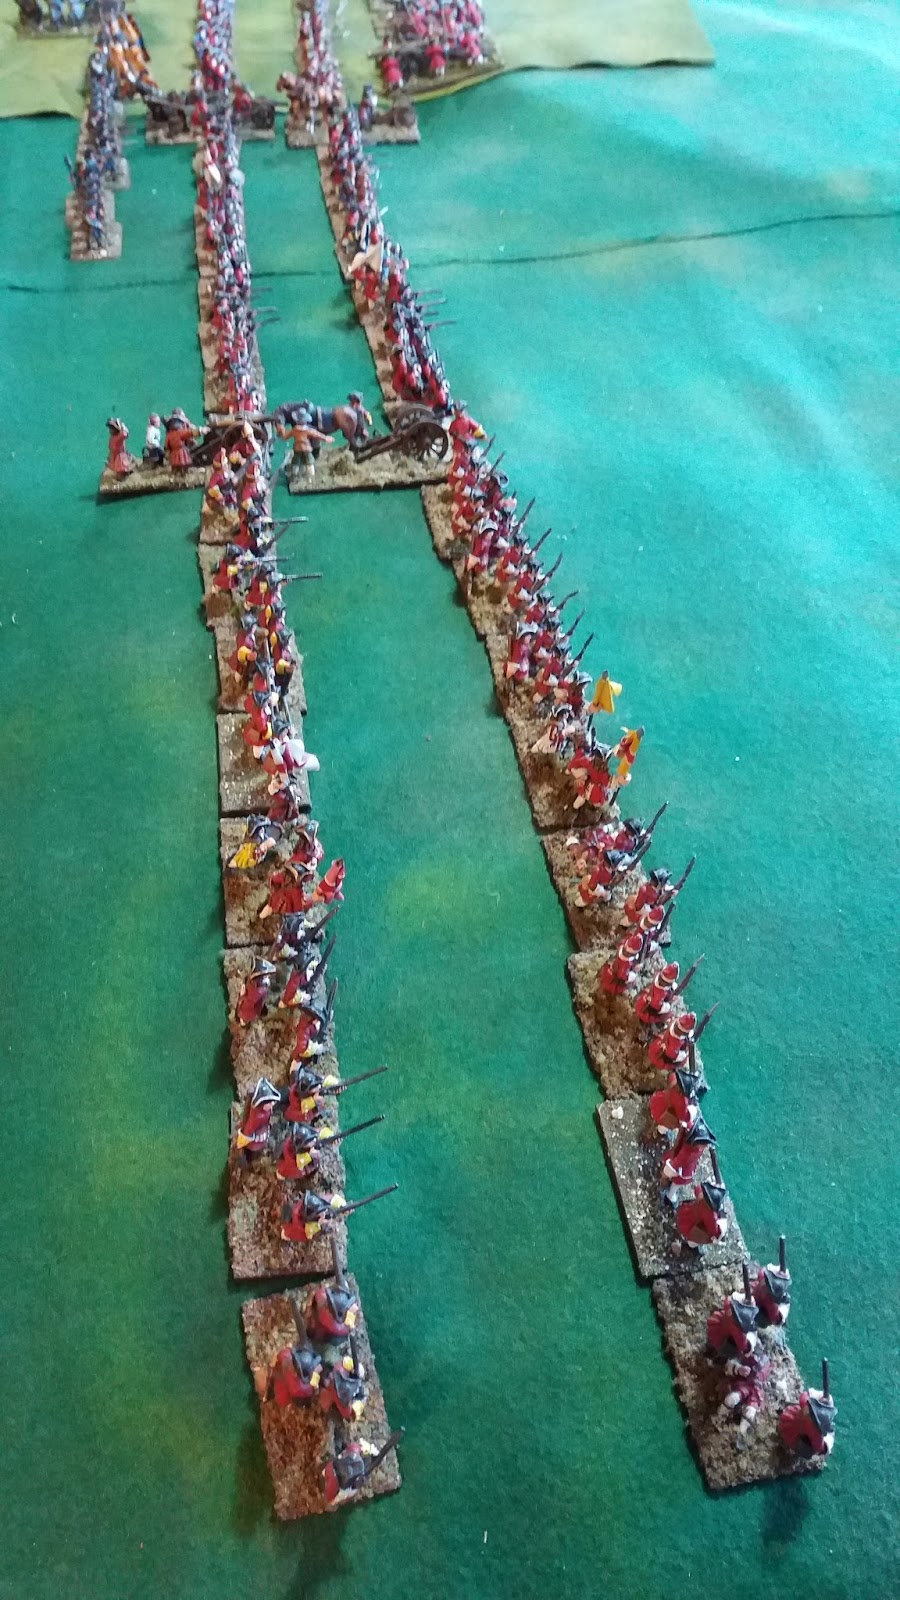
The endless red line of British troops on our right
The final position as the British finally got within range of the action...they lost not ONE SINGLE casualty in the whole affair, whilst I lost six of my eight battalions and Rick lost ALL his cavalry - Perfidious Albion indeed!
Sunday, 8 April 2018
Saturday, 7 April 2018
Friday Night Game - Wars of the Roses Battle of Northampton
Yesterday evening, Mark, John Chris and I met up at Julian's place for our semi regular Friday night game. We used Marks plastic Perry figures and Julian's mixed metal ones to refight the Battle of Northampton from the Wars of the Roses, using the To the Strongest rule set. Below is a brief description and map of the actual battle from Wikipedia:
Close up of one of my units of longbow men - these were deadly effective and as soon as John was in range, unleashed a hail of arrows, supported by the fire of our two rudimentary cannon. (Fortunately Julian obviously did not know about the rain in the real battle or he would probably have made a rule that they could not fire them!)
Another close up of the advancing Yorkists. After a couple of moves, Chris and I had combined such effective fire power on their centre that John had lost two or three units and his commander had been forced to scuttle from one unit to the next, as his men were slaughtered around him!
Marks Yorkist left flank advances on my right wing unit, pinned in between the barricade and the river Nene - if they were pushed back, they would drown....
A view of the centre midway through the game - Johns original command of 6 units has been reduced to two by our devastating archery. This also helped us when Julian finally managed to reach our line and attempt to induce treachery from one of Chris's units - he rolled a 4 but because we had killed so many Yorkists before he arrived, he needed a 5 or 6 - so our line stood firm!
Mark continues his advance - he had some success with archery and destroyed one of my units and disrupted another (far right by the river). The gap in the left of our line is where Johns final unit of knights charged one of my guns. He managed to kill the crew but was then in a position where combined fire from the remaining gun plus archery destroyed this last unit
Johns command figure flees from the table!
A general view of the centre near the end of the game - the empty space in the centre where Johns six units of Yorkists had been is eloquent testimony to the power of the Lancastrian longbows!
Yesterday evening, Mark, John Chris and I met up at Julian's place for our semi regular Friday night game. We used Marks plastic Perry figures and Julian's mixed metal ones to refight the Battle of Northampton from the Wars of the Roses, using the To the Strongest rule set. Below is a brief description and map of the actual battle from Wikipedia:
On
26 June 1460, Warwick, Salisbury and Edward landed at Sandwich with 2,000 men
at arms. King Henry VI and his Queen, Margaret of
Anjou, were at Coventry with their small army. Warwick
entered London on 2 July with an army of supporters numbering approximately
10,000.
The
King's forces took up a defensive position at Northampton, in the grounds of Delapré Abbey,
with their backs to the River Nene and a water-filled ditch in
front of them, topped with stakes. The defending army was around 5,000 strong,
consisting mainly of men-at-arms. The Lancastrians also had some field
artillery.
While
approaching, Warwick sent a delegate to negotiate with the King on his behalf.
The Lancastrian commander, the Duke of Buckingham,
replied "The Earl of Warwick shall not come to the King's presence and if
he comes he shall die." During Warwick's advance to Northampton he was
twice more denied access to the King's person. Once in position, he sent a
message that read "At 2 o'clock I will speak with the King or I will
die".
At two
o'clock the Yorkists advanced. The men were in column, but the hard rain
blowing in their faces somewhat hindered them. As they closed with the
Lancastrians, Warwick was met by a fierce hail of arrows, but the rain had
rendered the Lancastrian collection of cannon quite useless.
When
Warwick reached the Lancastrian left flank, commanded by Lord Grey of Ruthin, treachery ensued. Grey had his men laid down their weapons and simply allowed the
Yorkists to have easy access into the camp beyond. This treachery was the
result of a secret message from Lord Grey to March saying that he would change
sides if the Yorkists would back him in a property dispute with Lord Fanhope. Certainly
Warwick had ordered his men not to lay violent hands on ordinary soldiers –
especially those wearing the black ragged staff of Lord Grey's men. There may
also have been inducements and promises of high office by Warwick. Grey became Treasurer of England in 1463. After this,
the battle lasted a mere thirty minutes. The defenders were unable to manoeuvre
inside the fortifications, and fled the field as their line was rolled up by
attacking Yorkists.
The Duke
of Buckingham, the Earl of Shrewsbury, Lord Egremont and Lord Beaumont all died trying to save Henry from the Yorkists closing on his tent. Three
hundred other Lancastrians were slain in the battle. King Henry VI was captured
by an archer, Henry Mountfort
For our game, Chris and I took the Lancastrian defenders whilst Julian, John and Mark were the Yorkists. Chris and I had two commands each, our three opponents a single "battle", but we were slightly outnumbered. I commanded the right of our position - the right wing was under Duke of Buckingham (I think) and was 100% secure, but the scenario allowed the Yorkists to secretly nominate one of the remaining three defending "battles" to be a potential traitor. They had to get a unit into an adjoining square and then roll on a D6. Initially, anything but a 1 would get the target unit to change sides - 2 or 3 they just got out of the way, 4-6 they actually turned on their former colleagues. However, for every unit we destroyed or pushed back prior to the Yorkist reaching the target unit, the die roll would become successively harder!
The initial deployment - our artillery is in the middle right of this picture. Johns Yorkist command directly in front of our defensive line, Julian to the left, Mark to the right
One of Marks beautifully painted and based Perry units - Mark provided all the troops on the Yorkist sideClose up of one of my units of longbow men - these were deadly effective and as soon as John was in range, unleashed a hail of arrows, supported by the fire of our two rudimentary cannon. (Fortunately Julian obviously did not know about the rain in the real battle or he would probably have made a rule that they could not fire them!)
Another close up of the advancing Yorkists. After a couple of moves, Chris and I had combined such effective fire power on their centre that John had lost two or three units and his commander had been forced to scuttle from one unit to the next, as his men were slaughtered around him!
Marks Yorkist left flank advances on my right wing unit, pinned in between the barricade and the river Nene - if they were pushed back, they would drown....
A view of the centre midway through the game - Johns original command of 6 units has been reduced to two by our devastating archery. This also helped us when Julian finally managed to reach our line and attempt to induce treachery from one of Chris's units - he rolled a 4 but because we had killed so many Yorkists before he arrived, he needed a 5 or 6 - so our line stood firm!
Mark continues his advance - he had some success with archery and destroyed one of my units and disrupted another (far right by the river). The gap in the left of our line is where Johns final unit of knights charged one of my guns. He managed to kill the crew but was then in a position where combined fire from the remaining gun plus archery destroyed this last unit
Johns command figure flees from the table!
A general view of the centre near the end of the game - the empty space in the centre where Johns six units of Yorkists had been is eloquent testimony to the power of the Lancastrian longbows!
How it looked from the Yorkist side as the game ended - only one unit of Julian's cavalry and one unit of Johns foot knights actually reached our barricade, and both were wiped out. I don't think Chris lost any units at all - I lost one gun and one unit of archers who were wiped out by Mark. Its possible the real battle would have had a similar outcome if it had not been for the treachery of Lord Grey of Ruthin. We would certainly have been in a bit of trouble if Julian had succeeded in turning one of Chris's units as he attempted to - we were just lucky we had so many casualties on the Yorkists early in the game!
The extremely effective archery of our units was the key to this victory - we have often had games with these rules where both sides pelt each other with arrows to virtually no effect and I think his was what happened between Julian and Chris - my archery against John was however outstandingly effective and it meant Julian could not get the potential traitors in our midst to change sides mid battle! All good fun (for we Lancastrians) - I am sure we will do it all again soon. Tomorrow I am off to Barry's for an all day Marlburian game so a report on that outing will follow in due course.
Thursday, 5 April 2018
War of 1812 - 49th Foot (Hertfordshire)
I have FINALLY managed to complete the second of the British units for the War of 1812. Not sure what will be next - it should be RCW but that involves expenditure that may not be within my current resources to achieve! I am sure I have some unpainted metal I can work through but its not the same thing - I like a bit of motivation to get the creative juices flowing - ah well, never mind!
Here are a few images of the completed OG Brits....
Above and below, two views of the 49th (Hertfordshire) Regiment of Foot, circa 1812
Below, a view from above, showing the basing
Below, a rear view of the battalion
I have FINALLY managed to complete the second of the British units for the War of 1812. Not sure what will be next - it should be RCW but that involves expenditure that may not be within my current resources to achieve! I am sure I have some unpainted metal I can work through but its not the same thing - I like a bit of motivation to get the creative juices flowing - ah well, never mind!
Here are a few images of the completed OG Brits....
Above and below, two views of the 49th (Hertfordshire) Regiment of Foot, circa 1812
Below, a view from above, showing the basing
Below, a rear view of the battalion
Saturday, 31 March 2018
Friday, 30 March 2018
War of 1812 - British Reinforcements
As I had a few figures left over from the first two battalions of British regulars that I did a few months ago, I recently bought a few more packs of Old Glory Second Edition figures to combine with them and form another two battalions.
So far I have finished off the command element - officer and two ensigns - for each regiment. I decided this time to do the 49th Foot and the 64th Foot
The 49th Foot had green facings and served throughout the war, being present at a number of engagements, including Queenston Heights, Fort George, Stoney Creek, Beaver Dams, Cryslers Farm and Plattsburg. The 64th arrived in 1813 and seems to have had a quieter time, but I chose them as, like the 13th Foot, they seem to have transferred from warmer climes and to have worn a white shako cover, which adds a bit of variety to the force!
The first three images are of the 49th Foot command element, the second three are of the 64th. I did the officers with black shakos but the enlisted men will have the white covers.
As I had a few figures left over from the first two battalions of British regulars that I did a few months ago, I recently bought a few more packs of Old Glory Second Edition figures to combine with them and form another two battalions.
So far I have finished off the command element - officer and two ensigns - for each regiment. I decided this time to do the 49th Foot and the 64th Foot
The first three images are of the 49th Foot command element, the second three are of the 64th. I did the officers with black shakos but the enlisted men will have the white covers.
Sunday, 25 March 2018
Portuguese Napoleonic Officers
Code PNP 1 - Brigadier - above and below
Code PNP2 Lieutenant - above and below - to be honest, I thought he was higher rank until I checked the website for the codes!
Code PN18 - mounted officer - was supposed to be PN19 a standard bearer!
I am happy with the way these have turned out
Just three figures that I have been working on , on and off, over the last week or so. Two senior officers and an infantry Colonel, all by Front Rank.
The Colonel was a mistake by Front Rank - he was supposed to be a drummer I think - one code out! They sent a replacement figure and I managed to source a non FR horse for him to ride ( thanks Andrew!) He has gone from bare metal to completed in one day, but the other two have sat on the painting desk for several days - could even be a couple of weeks - 90% finished but not quite done. Today I finally got some motivation and finished them off!
Code PNP2 Lieutenant - above and below - to be honest, I thought he was higher rank until I checked the website for the codes!
Code PN18 - mounted officer - was supposed to be PN19 a standard bearer!
Friday, 23 March 2018
R.C.W. Tanks
These are the two tanks I purchased from Old Glory in February, before my OG Army Card ran out. They are a French FT and a British Whippet - the Whippet is quite a substantial vehicle, I got quite a surprise at the size of it when it arrived. The Renault on the other hand is tiny - hard to imagine how two men managed to get inside such a diminutive vehicle.
They are finished in dark green and will serve as support for the Bolshevik forces when we eventually get them on the table!
Above and below are two views of the Renault FT with a couple of Bolshevik officers by Copplestone to indicate the size of this vehicle
Below - the rear elevation of the Renault
Above and below, the Whippet tank, with a Copplestone Commissar alongside
Above - a comparison of the two vehicles, with a Brigade Games figure to show the relative sizes. The armament shown on the Whippet is 4 x .303 heavy machine guns. the little Renault has a 37mm gun.
These are the two tanks I purchased from Old Glory in February, before my OG Army Card ran out. They are a French FT and a British Whippet - the Whippet is quite a substantial vehicle, I got quite a surprise at the size of it when it arrived. The Renault on the other hand is tiny - hard to imagine how two men managed to get inside such a diminutive vehicle.
They are finished in dark green and will serve as support for the Bolshevik forces when we eventually get them on the table!
Above and below are two views of the Renault FT with a couple of Bolshevik officers by Copplestone to indicate the size of this vehicle
Below - the rear elevation of the Renault
Above and below, the Whippet tank, with a Copplestone Commissar alongside
Above - a comparison of the two vehicles, with a Brigade Games figure to show the relative sizes. The armament shown on the Whippet is 4 x .303 heavy machine guns. the little Renault has a 37mm gun.
Subscribe to:
Posts (Atom)