I set up a small War of 1812 scenario on my 3 x 3 table, just to see how the Devil to Pay rules would work in this era, AND as a solo game.
I had a slightly larger but lower quality American force attacking a British defensive position, which seemed a reasonable approximation of what happened in the majority of actions in this conflict. I rolled for the leaders and the Americans got a tactical genius (I rolled a 6) whereas the Brits got the inbred third son of some minor landowner in the Home Counties (I rolled a 1). The result of this was, the three British units had two command/action tokens per turn each plus one from the officer, while the four US units had the same two each plus THREE from their leader - would this be the game changer?
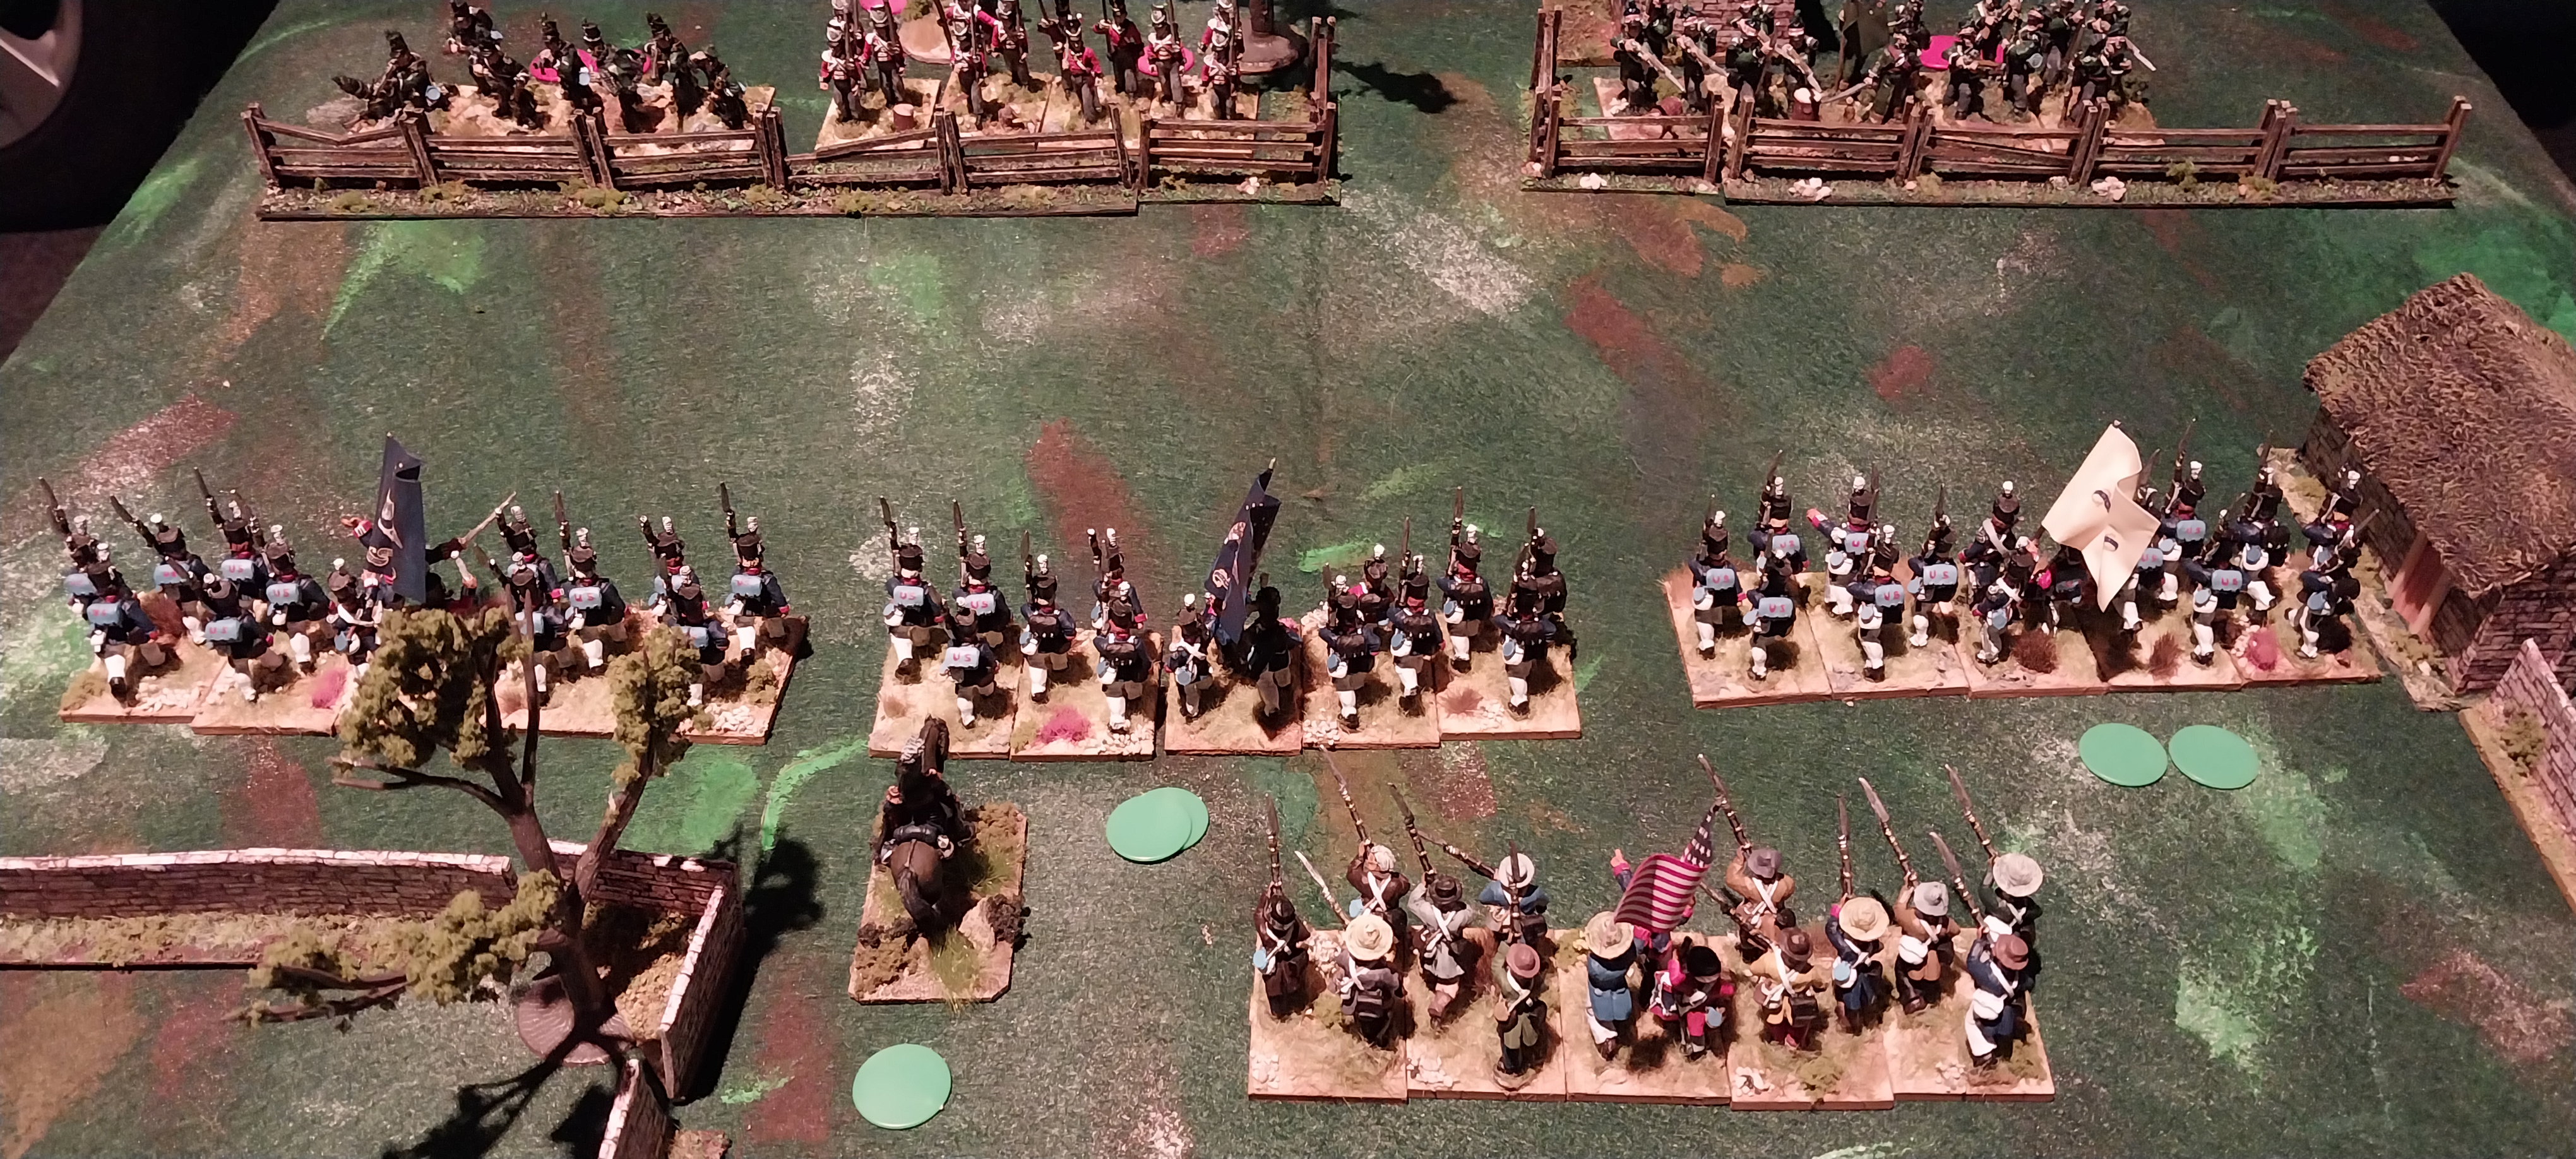
Initial set up, the Brits (at bottom) are defending behind a rail fence on slightly elevated ground. To the right are elite riflemen and to the left standard Glengarry Light Infantry. Reinforcements in the shape of an experienced Line battalion are arriving to support
The American assault force - three standard battalions of line infantry with some poor-quality militia in the second line
Using the standard activation chits, I drew Red Move, then Blue Move, then Take a Break (for the first time) then Blue Charge. The Americans were not within charge range, so were unable to take advantage of that order card.
The next card out was Blue Fire, and the three leading units of American line infantry let rip at the waiting Brits. At the distance they were firing from with smooth bore muskets, and the enemy in shelter behind the rail fences, each five base unit only rolled 2 D6. Hits are as shown on the red D6 above.
After staunchly weathering the rather ineffectual fire of the advancing American lines, the more experienced British troops calmly took aim and responded with a far more effective volley of their own. The officers were busy, moving between their units, encouraging the men (the next action was Red Rally - the Brits rallied off ALL their hits, but the Americans retained a couple on each of the leading units).
Red Fire was next out of the bag and a deadly volley rolled out from the re-energized British line. Casualties mounted and a base was removed from one of the American units. The turn came to an end with the appearance of the second Take a Break chit and all the action tokens went back in the bag and the order tokens were replaced on their respective units.
Turn two and the first action was Red Charge - the Blue Fire chit was next up and American marksmanship improved, with two hits on each British unit, despite the cover of the rail fence. However, return fire was again superior, and another American unit lost a full base.

The Carpe Diem action was next and, in a roll off, the Brits got to choose what action suited them best. With two hits on each of their three units, the Rally was selected, but results were disappointing this time. Blue then moved up and then also had a rally action, which helped remove some of the casualties they were carrying. The Brits were unable to make use of the Blue rally in their phase, as they had insufficient order tokens left (the issue with having a poor officer leading them) and preferred to hold onto them for another round of fire, which they got when the next action token was revealed. Once again, the British musketry was deadly, and another base was removed from an American unit. In response, the Americans, wavering after the devastation wrought by the enemy fire, fired high, and not a single hit was sored....however, next action was a Blue Rally, which again saw order restored to the attackers ranks, and next came Blue Charge!

All four American units surged up the slight incline to assault the depleted Brits manning the fence line.
On the American right flank, a half strength line infantry battalion and the fresh militia unit charged into the Glengarry Light Infantry. They won the melee 3 - 2 and the Canadians "skedaddled" three D6 - but miraculously only rolled 5 in total, so were still on the field!
In the second melee, the attacking Americans had two dice to four, but won 2-1 and the British line infantry skedaddled right off the table! On the British right flank, the hard-bitten veterans of the rifle unit smashed the attacking American, who skedaddled back 15 inches - almost to their original starting point.
The action, though, had been decided, and the riflemen fell back in good order, firing as they went, to cover the retreat of their colleagues, leaving the depleted Americans in control of the position and the field!

That was a fun little game that only took about an hour to play and lasted two turns. As expected, the poor British commander meant a lack of command points was available to the Brits at a couple of crucial points, so they had to choose whether to rally off hits (but forgo shooting again in the turn) or soldier on carrying 2-3 hits on each unit but retaining the ability to cause injury to the Americans. In the end, they just ran out of puff - the Americans always had more opportunities to do things than the defenders and this was particularly important in the last couple of actions in move two, when the Americans were able to rally off most of the hits the British had just put on them, and then get the charge card when they were within 6" and in a position to make the assault.
I felt the rules worked well for a solo game and I will be happy to use them again. If the leadership traits had been reversed, I suspect the result would have been a lot different - and isn't that a "realistic" reflection of the difference an experienced or inspirational commander can make to the outcome of a battle?
Thanks for stopping by and spending some time reading my report and I look forward to your comments and feedback!


.jpg)


.jpg)




.jpg)


.jpg)
.jpg)


.jpg)
.jpg)


.jpg)