Napoleon in Egypt Game
Painting of the Battle of Alexandria
Today we fought the third (I think) game in our occasional campaign of the British and French confrontation in Egypt early in the Napoleonic period. This time, the Brits had advanced following their very close fought victory in the previous game and had encamped in the desert near Alexandria. The dastardly French made a sneaky night march across the sand and appeared out of the gloom just as day broke. A single shot from the British forward picquets awoke the slumbering redcoats, and battle was joined.
The initial layout was based roughly on the battle of Alexandria but this was not a refight and number of troops on each side was roughly the same (I think, although it did not feel that way to we British!)
The French had an advantage in being allowed to make a plan and deploy as they wished, whereas the British were in their camps and could only react from there once the alarm went up.
In essence, the game developed into three linked but almost separate battles. Rick, commanding all the French cavalry on their right flank, took on Adrian on our left. Chris in the centre engaged both Paul and Barry, and Mark, with assistance from the left of Chris's centre, took on my brigade on the British right wing.
I had five battalions plus a single gun low on ammo and Mark had four demi brigades ( I think) of three battalions each - Chris had the same. I think all the Brits had four or five battalions, so on paper it would look evenly balanced but as you will see from the pictures, that was not quite the case in practice.
The outcome felt like a foregone conclusion from pretty early on and just before lunch, it looked like Chris would win the game for the French in the centre - in the event, it took a few more turns after lunch for the end to come, but we were all done and dusted by 2pm, which is very early by our usual standards.
The outcome of the total annihilation of the British army is that the next (last?) scenario in the campaign will be wholly fictional, with the Brits attempting an nineteenth century Dunkirk style evacuation, under pressure from an advancing French army.
Here are the pics and brief descriptions of what I know/can recall....
The table upon our arrival - this is the British left flank
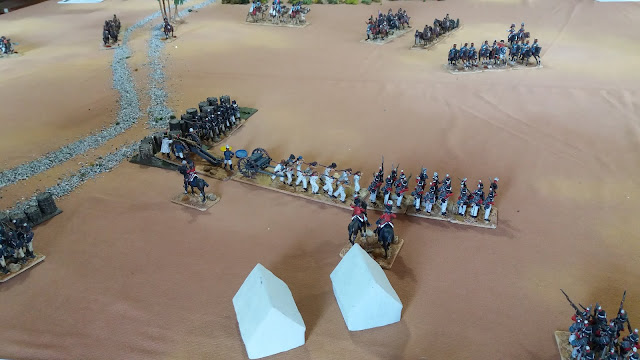
Table as the game commenced - the British right flank. That's Eighteen battalions of French you can see advancing against my forward defensive position
The forward redoubt manned by the 28th foot and a gun with very limited ammo
That's a lot of Frogs out there.....!
As it was night, a die roll per unit per turn (for the first three turns) caused some confused marching
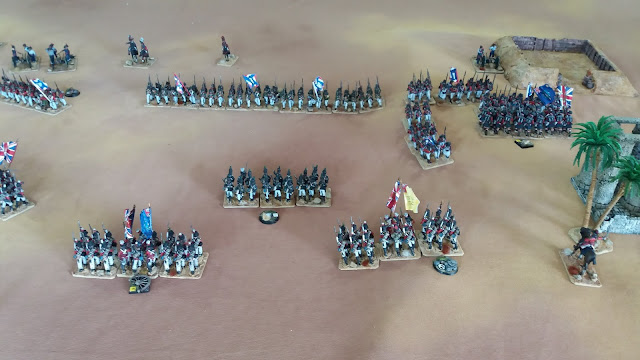
Around turn five, the Brits are awake and the guard battalion is retiring to join up with the main force advancing from the tent lines
In the centre, a couple of lone battalions behind gabions face the advancing French
The British left wing who were assaulted by the entire French cavalry force
French cavalry caught a unit in the flank, destroyed them, then broke onto this hapless artillery crew..
My brave boys - five battalions face around twelve or fifteen coming the other way!
Our one and only mounted unit charges in column (!?)
In the centre, British reinforcements come forward to the aid of those units behind the gabions
We have to give it a go - after enduring and surviving one round of close range musketry from a larger force I decided trading shots would not work and we had to resort to giving them the cold steel...
...so my five battalions charged forwards to death or glory.
Back on the other flank, Adrian is having a tough time of it containing Rick's cavalry
And in the centre again, there seem to be a lot more Frenchies than Brits!
Half unit of dismounted light dragoons versus full unit of mounted cavalry - bet you can guess the result!
The gabions did give the unit behind them very significant benefits - here Chris deploys three battalions to one but Paul saved on anything but a 1!
The advancing demi brigades on my flank, seen from behind the French position
The result of my charge - unit on the extreme right routed and French have occupied the ruins. the 42nd Highlanders did not win so are still engaged. Two of the three units that charged in the open to the left were pushed back, leaving the solitary unit of Corsican Rangers to fight three battalions on their own....not quite what we were hoping for!
Basically the same position from the French perspective
But wait, what's this? The plucky little Italians won the next combat against the combined might of the French and pushed them back!
I pulled the Corsicans back and a line charged a column - but contrived to be defeated!
Part of the scenario was that if the French could get six units off our table edge, they had captured our depot and the campaign in Egypt was over - here two battalions are about 300mm from our table edge....
On the other flank Adrian is gradually giving way to Ricks horsey boys....
That's three units close to reaching our table edge..by this stage my brigade had failed a morale test and quit the field so the game was really over, but we carried on to the bitter end
A wall of French advancing on two British Guards battalions.
Ricks cavalry hit one of Adrian's remaining two battalions in the flank - not good!
The centre from the French side - shortly after this was taken, Paul and Adrian both failed brigade morale tests and followed me towards the boats!
Close up of the unit that staunchly held out behind the gabions against all comers
The centre of the table with only Barry's four British battalions remaining
The British left flank devoid of my troops as the French march unopposed through our camp.
I am not sure if I have ever participated in such a total drubbing - the British were wiped out in this game, and in a relatively short time too. Unfortunate for Mark as he probably had plans for a few more games in the campaign but now, there will only be one, as the British attempt to withdraw and avoid a total disaster!


A disastrous British result but beautiful table! Seeing all of Mark’s fine troops on the table must be satisfying nonetheless.
ReplyDeleteAbsolutely correct Jonathan - I was probably a bit grumpy as I never like it when my own poor tactics lead to defeat! After witnessing how hard it was for the centre to shift one unit from behind some gabions, I realized maybe I should have sacrificed the "Glorious Gloucesters" for the greater good! In my defence, if the bayonet attack had come off and we had pushed half of Mark and Chris's forces back a couple of moves, things might have come out better for the Brits!
DeleteAnother great account of a fine-looking battle. I have just read Mark's update, and it looked like fun even though you were on the losing side.
ReplyDeleteThank Lawrence - it is certainly always a treat to play with Marks beautiful figure collections - just a pity he has gone to all that effort for such a short lived campaign!
DeleteA marvellous looking game Keith...
ReplyDeleteI was on the losing side when we played... I was of course French...
This was the result I would have wanted...;-)
You may still stop them on the beaches...
All the best. Aly
Thanks Aly...yes, I did suggest to Mark that we would be able to use the RN frigate I have just painstakingly completed, but he came up with some technicality about the depth of the water at the embarkation point so I suspect we wont be able to use her!
DeleteTruly superb, armies, terrain, and ruins!
ReplyDeleteThank you Phil - I agree - but cant take any credit, as the whole lot was created and provided by Mark
ReplyDelete