Tuesday, 11 February 2025

A Few More Painted Figures - AND A Message From Our Sponsors!

 Here is the second unit of Auxiliary infantry from Cromarty Forge - supplied by Adam at Adrah Labs 3D Printing in Geelong, Victoria.


I did this batch in blue, in contrast to the green of the previous unit


And secondly, the first stand of metal Gripping Beast legionaries make an appearance


This is a command stand comprising the centurion, the cornicern and the signifer from the command pack, plus 11 legionaries advancing with gladius.


Pretty happy with how these have come out, to be honest - although the shield designs are not as nice as they could be - I might have to see how I go with LBM transfers - something I am not keen on using really, but if I can get them right, they will certainly improve the look of the figures.....

I had a call from my sponsors at the NZ Tourist Board the other day, threatening to cut off funds if I didn't include some promotional material in my blog, so here we go.

A short notice, overnight break away arranged by my dear wife - we spent half of Saturday at the small country town of Paeroa, for their annual Scottish Highland Games (I didn't bother taking any pics there - pipe bands, small girls dancing and caber tossing are not particularly photogenic, or interesting, in my book!)


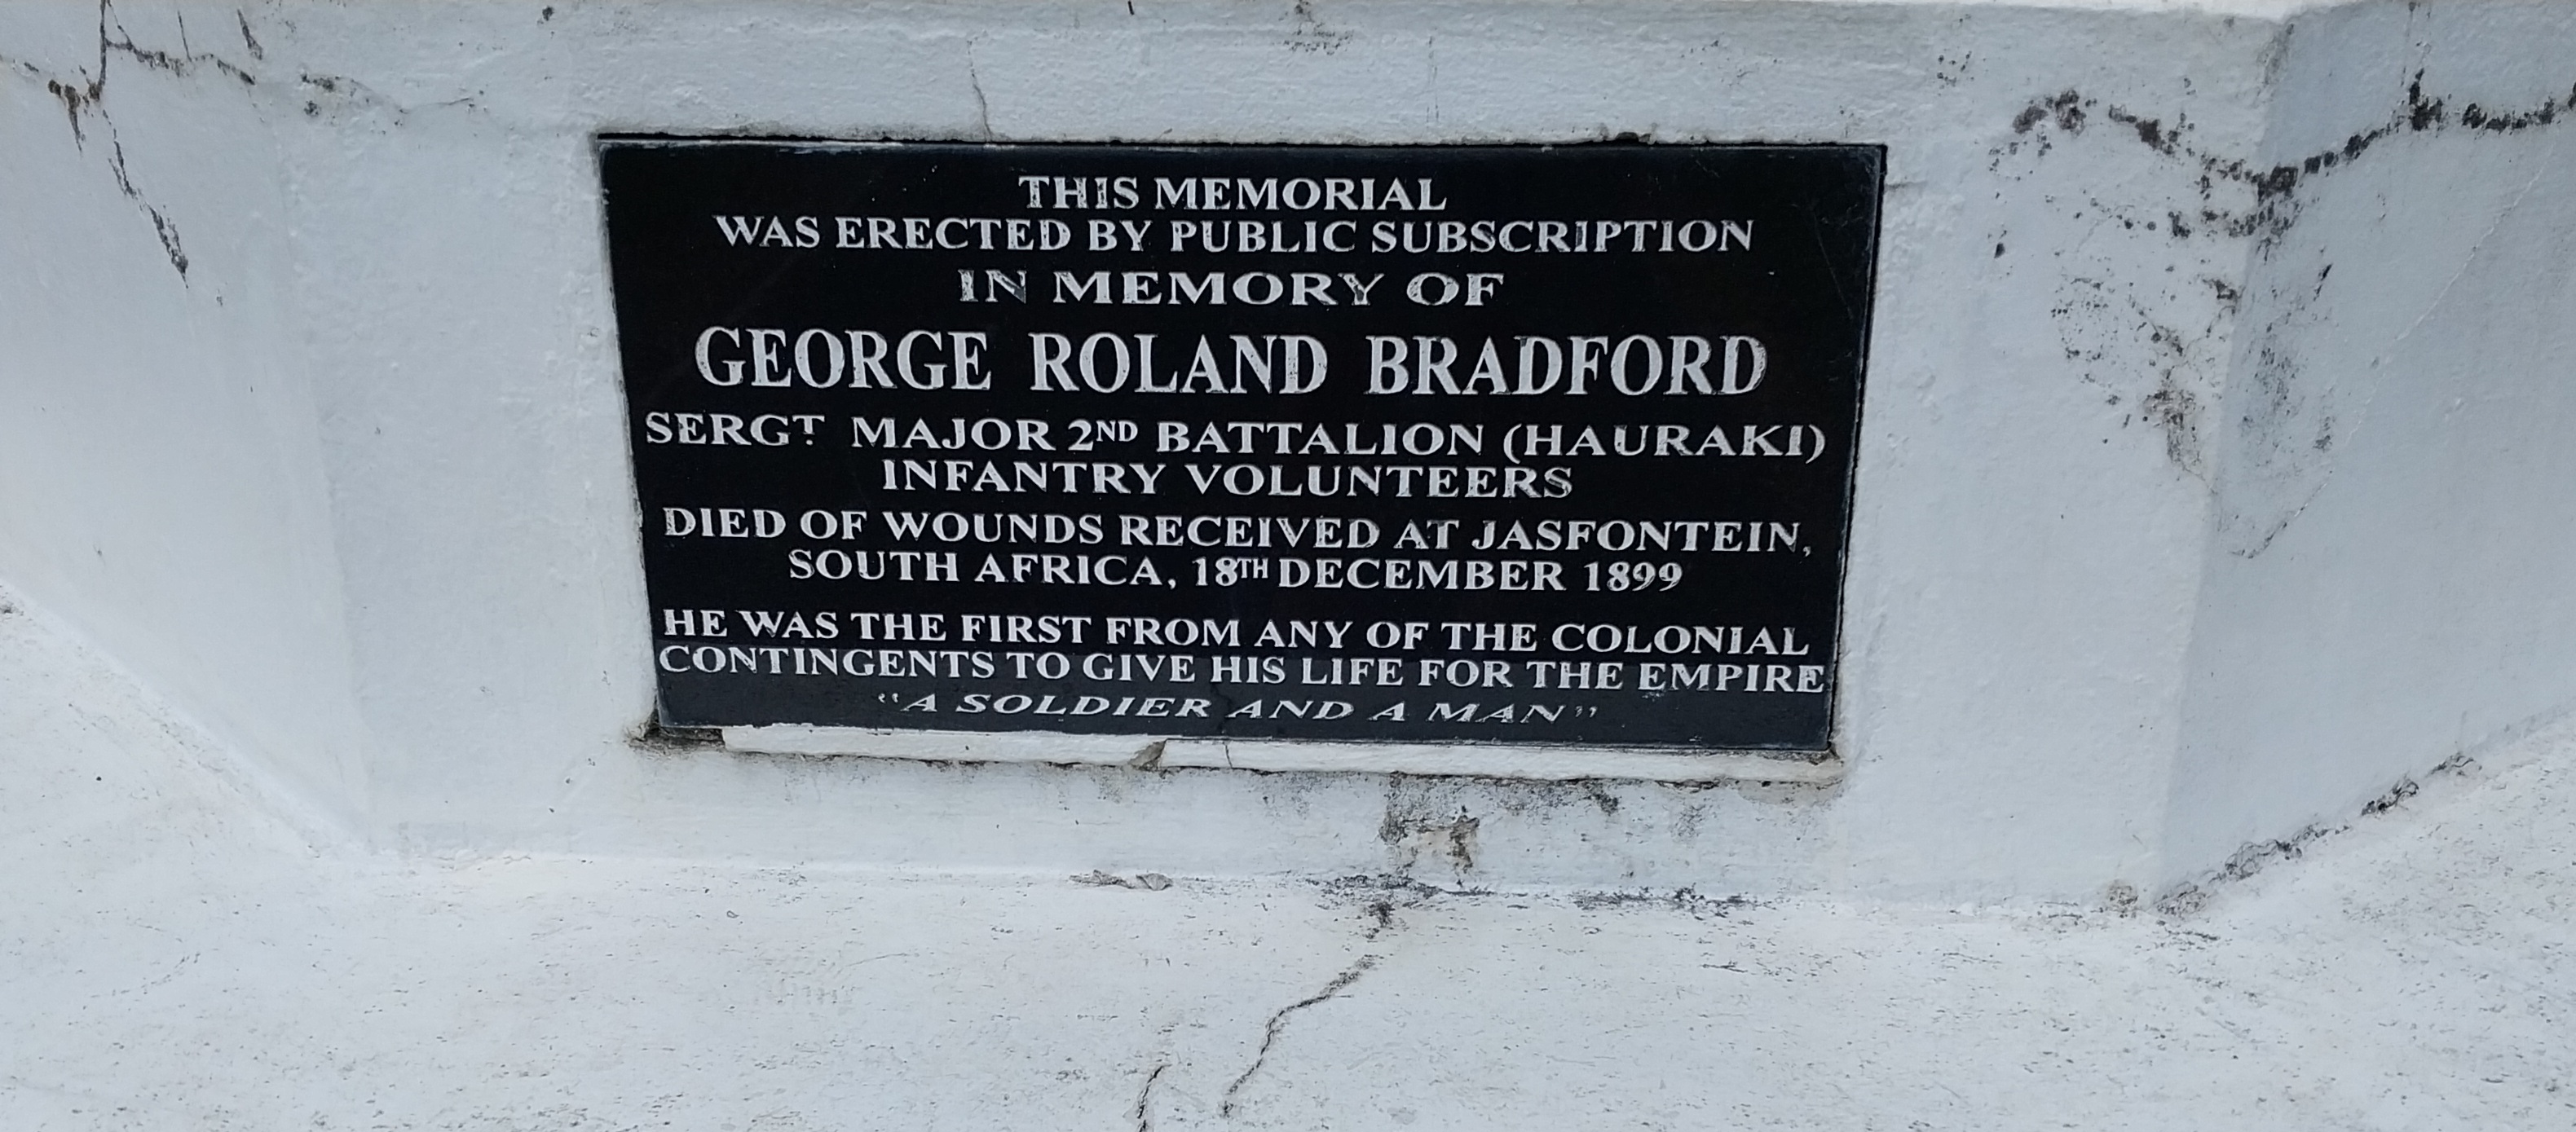
After my wife had had enough Caledoniafication, we popped up to the local war memorial that dominates the whole town from atop a small hill




A short twenty-minute drive through the countryside later, we arrived at our Air BnB farm stay accommodation for the night and were greeted by the reception committee...


The location


Quite a cool little set up, a couple of km up a steep farm track, with fields in front and native bush behind the purpose-built units. The one on the left has a double bed, the middle one is toilet/shower and on the right are two single beds - its obviously set up for the modern standard sized family unit - but the nice thing is, the owners don't mix n match if only one cabin is in use - if you only need the double bed, they don't try and rent out the other room separately, which means you always have the place to yourself!


Bucolic views from the front gate of the paddock the accommodation was located in.


Inside, the unit is certainly compact - but really, all you need for an overnight stay


Spent a few hours on the deck in a beanbag, alternately reading and sleeping in the afternoon sun.


A short walk down the road and we got the view in the opposite direction 


Saturday evening we headed into the nearby historic gold mining town of Waihi for dinner - and did the same Sunday morning for breakfast!


Your intrepid reporter, in a selfie with some of the local herd! We did get up close and personal with them, and our host Neil, when the latter came down to introduce himself and hand feed the beasts!


View from the gate as we departed Sunday morning. After the aforementioned breakfast in Waihi, it was a leisurely trip back over to Pukekohe, arriving home late morning, with time to chill out for the rest of the day before the unwelcome return to the "reality" of work on Monday morning!

Thanks for dropping in - hopefully another solo game will be on the table tomorrow and reported on shortly thereafter.

Friday, 7 February 2025

Final 10mm Battle of Medway AD43 Solo Game - OHW Scenario 7

 I have to admit to being a bit behind schedule this week - Wargame Wednesday didn't happen, but fortunately, Thurs 6 Feb is a public holiday here and I took annual leave for Friday 7, to make it into a four-day weekend-yay!

The relevance of this is, I got the solo game played after lunch today. I thought OHW scenario number 7 could work well for the final Roman assault on the British army of Togodumnus and Caratacus, at which the former died.

Not sure the balances work all that well sometimes, with 6 units per side, but once again, from what little we actually know, a historical result.


Needless to say, the Red army are the Britons on this occasion, with the Romans executing the flank attack on their hilltop position. The Britons army comprised three units of heavy infantry and three of skirmishers, the Romans two auxiliary infantry and four veteran heavy infantry - the legionaries.


The Britons deployed on the large hill


The four flanking veteran heavy infantry on the Britons left flank.


Turns 1 (above) and 2 (below) were simply periods of movement by both sides - two units of British skirmishers headed forwards to contest the passage of the auxiliary infantry. Meanwhile, the four veteran units close in on the Britons flank.


On turn 3, VHI II made contact with the left most of the British skirmisher units, putting 4 hits on them, whilst VHI I inflicted a solitary hit on the British HI unit, with both the British units passing the morale test. In reply, the British HI put 3 hits on VHI II, but VHI are not required to take a morale test. Elsewhere, one of the skirmish units put a single hit on the blue auxiliary infantry, who passed their test.


In turn four, the two remaining Roman VHI units combined in an attack on the front and flank of the third British HI unit at the rear of the hilltop, inflicting 5 casualties in one round of combat - but the Britons held firm. None of the skirmish units managed to cause any damage - they were rolling two hits but then had to subtract one for being LI and another because their target was armoured. I wondered if I was doing this wrong but double checked, and there is no mention of a minimum casualty rate of 1 or anything like that, so I carried on playing the rule that way for the remainder of the game.


Turn 5 was pretty much more of the same, particularly for the LI who were totally ineffective against the Roman heavy infantry.


On turn 6, every unit on the table was engaged in close combat - both the auxiliary infantry units did damage to the LI - but the latter passed their morale tests. Then, VHI I rattled the first of the British HI, and they fell back. VHI II put another two hits on the LI on the hill, but they stood their ground, and likewise with the other two British HI units at the rear of the hill.
In reply, once again, all three skirmish units failed to get any hits at all on the legionaries, whilst the hits from the two HI units still in combat were minimal.


Turn 7, and the auxiliaries were both piling the pressure on the British skirmishers, inflicting 4 and 3 hits respectively, although both British units stood there and took it. On the hill, all the veteran Roman infantry scored 3 or 4 hits on their opponents, resulting in the disintegration of the skirmish unit, which had failed to score even a single hit on VHI II. At the rear of the hill, VHI IV forced the defending British HI to give ground, as they failed their morale test after having suffered significant casualties.


In turn 8, the skirmish units both disengaged from combat with the auxiliary infantry and fell back towards the British position. The VHI on the hill suddenly gained total ascendancy, dispersing one British HI unit completely, and forcing the other two to fall back.


As the auxiliary infantry closed in at a 90-degree angle to the legionaries' flank attack, and the British army morale had already dropped by 50%, I decided to call the game as a Roman win at this point


Another fun little game, as long as you are not rooting for the Britons! They will win at some point - possibly if I do a Boudicca inspired campaign with these figures. For now, though, I might try getting some of the other collections out of the boxes and giving them a go at some of the OHW scenarios!

Thanks for popping in and bye for now!

Tuesday, 4 February 2025

Some Long (ish) Awaited New Arrivals

 Whilst still on Christmas and New Year leave, back on 4 Jan, I put in a small order of 5 packs of 10mm EIR metal figures from Gripping Beast, to augment my Cromarty Forge collection. These took quite some time to be dispatched, and then they took a while to get here. The actual air trip from one side of the world to the other took about three days, but from payment to arrival in house took a month!


And were they worth the wait? Well, on balance, yes, I think they probably were. I have enough figures in hand - 90 legionaries plus 10 lots of 3 figure command groups - to make around 8 x 14 figure elements, plus some leftovers. 


The downside is that, like most metal ranges in this scale, poses are pretty limited, but I have considered mixing them in with the 3D prints - having the former in the front line, with the second line made up of the metal figures.....although then again I don't want to end up with far too many Romans in comparison to their "barbarian" enemies - first world problems, and no mistake! 

Meanwhile, the last of the Cromarty Forge figures are finished, so they will appear in my next post, and possibly the first examples of painted Gripping Beast figures will join them, too. Until then, thanks for your continued interest and support!

Sunday, 2 February 2025

A Few More 10mm Additions and Some Inspirational Reading

 I finished off the Roman Auxiliary slingers pretty quickly - one unit in red, the other in green - which matched the archers that are already part of my EIR force.

Also finished is a British command stand, this one being a druid and one of his acolytes, to help inspire the Celtic warriors!


Red slingers, front and rear


And the same for the green uniformed group


Druid summoning the ancient Celtic Gods to help defeat the invading Romans


His tattooed assistant holds up a recently decapitated Roman head.


On the reading front, I have borrowed this from the library recently, in addition to another couple of Simon Scarrow novels. I am hoping to find some material to inspire skirmish level games involving some of the 28mm female Soviet figures I painted a few years ago! 


In the meantime, here is one incredible story of female soldiers holding off the 16th Panzer Division at the start of the Battle of Stalingrad 

Like the rest of the Soviet Union's defenses, Stalingrad was unprepared for the Germans. When the Wehrmacht's Army Group Center approached the city from the north, it threatened to bypass all of the city's prepared defenses. In the northern area, the Red Army had only green volunteers from the 1077th Anti-Aircraft Regiment.


The 1077th was a poorly trained, undersupplied unit with no infantry to support them. Their only weapons were M1939 37mm and M1939 (52-K) 85mm flak guns, with which they were to defend Gumrak Airport from aerial bombardment. The unit was also fully manned by female teenagers, fresh from their high school graduation.

On Aug. 23, 1942, the German Blitzkrieg hit Stalingrad in full force, leveling much of the city from the air. When the 16th Panzer Division began to move in on the city from the north, it came face to face with the girls of the 1077th -- and their flak rounds.

The teenage defenders of Stalingrad had lowered the elevation of their anti-aircraft guns and pointed them right into the oncoming German offensive. It was the first resistance the Germans encountered in what would become a failed five-month fight for control of Stalingrad.

For two days, the 1077th fought shot for shot against hundreds of enemy tanks, thousands of enemy troops and aerial attacks from the German air force, the Luftwaffe. According to official Soviet records, (which are probably exaggerated), the young women of the regiment destroyed or damaged 83 tanks, 15 armored personnel carriers, dispersed three battalions of infantry and shot down 14 enemy planes.

The Germans didn't discover who was manning the flak guns until they wiped them out, destroying 37 positions. After defeating the young gunners, the 16th Panzer Division referred in their official war diary to the 1077th's "tenacious fighting women," which is as close to a compliment one might find from an enemy during the Battle of Stalingrad.

There are a couple of YouTube files covering the tale, too.


Thanks for you visit and for leaving a comment so I know you have dropped by!