Just a brief warning to start with - I took A LOT of photos at Barrys last Sunday!
And here they are!
One European force - Bolsheviks from my collection
The Afghan enemy whose task was to prevent any Europeans crossing the table and exiting their table edge.
My European command, Brits plus the Whippet tank
View of the table with, left to right - Paul, Andrew Chris and Mark
Barry and Pauls Afghan commands
The Afghan side of the table
Nicks White Russian command
Nick had LOTS of armoured support - not sure how he convinced Andrew to let him use it all!
My command was the left flank of the 4 European commands (Rick was with us too but I did not take any pics of his troops at the start of the game, for some reason!)
Barry was opposing me.
Afghan snipers on the high ground
First blood to the Afghans ancient artillery - Andrew blew up Marks Bolshevik armoured car!
I was moving as far left as possible...
Barrys recently painted Afghan lancers - would they succumb to the usual curse of the newly painted unit - time will tell!
The White Russians move forward.
And are engaged by the snipers on the high ground - combined HMG fire from my two armoured cars plus Nicks, drove them off their vantage point soon afterwards!
On our right flank, the Bolsheviks move forwards.
And Afghan lancers under Andrew's command move out to meet them.
First view of Ricks command - his own Indian infantry and assorted vehicles, supported by cavalry supplied from my collection.
Nicks Whites encounter more wily tribesmen on the high ground!
Another European vehicle goes up in flames, this time, one of Ricks.
Afghan lancers move up...
... to confront the Bolshevik forces.
The Mad Mullah - leader of the Afghans opposing my force.
Andrew's lancers charge a Bolshevik infantry unit.
One of the "event" cards produced an ambush - more bloody snipers on the high ground adjacent to Marks Bolsheviks!
A mass melee erupted in the centre, with Afghan tribesmen commanded by both Paul and Chris, hurling themselves at Nicks massed armour - close combat was literally the only option the Afghans had to beat the armoured cars. After several rounds of combat, honours were about even.
My column, led by (now) dismounted cavalry, cautiously probe forwards.
A large space where Nicks White Russian should be - those not wiped out by the Afghans were in retreat from them!
Andrews Afghan lancers led a charmed life and seemed to keep Marks entire force bottled up on our side of the table for most of the game.
Combat in the centre continues but with much reduced forces on both sides!
Rick insisted I take a picture to prove he can actually throw a 6 - or even a pair. Prior to this, his cries of pain and gnashing of teeth indicated his dice rolling skills were up to their usual abysmal standards!
Rick cavalry (red and white pennants) defeated the attacking Afghans with the double 6 roll!
Some of the White units continue the brawl in the centre.
I cant remember what these were about - or who rolled them!
The Bolsheviks still making zero headway against the lancers.
Although to the left of the woods, they were making a bit more progress.
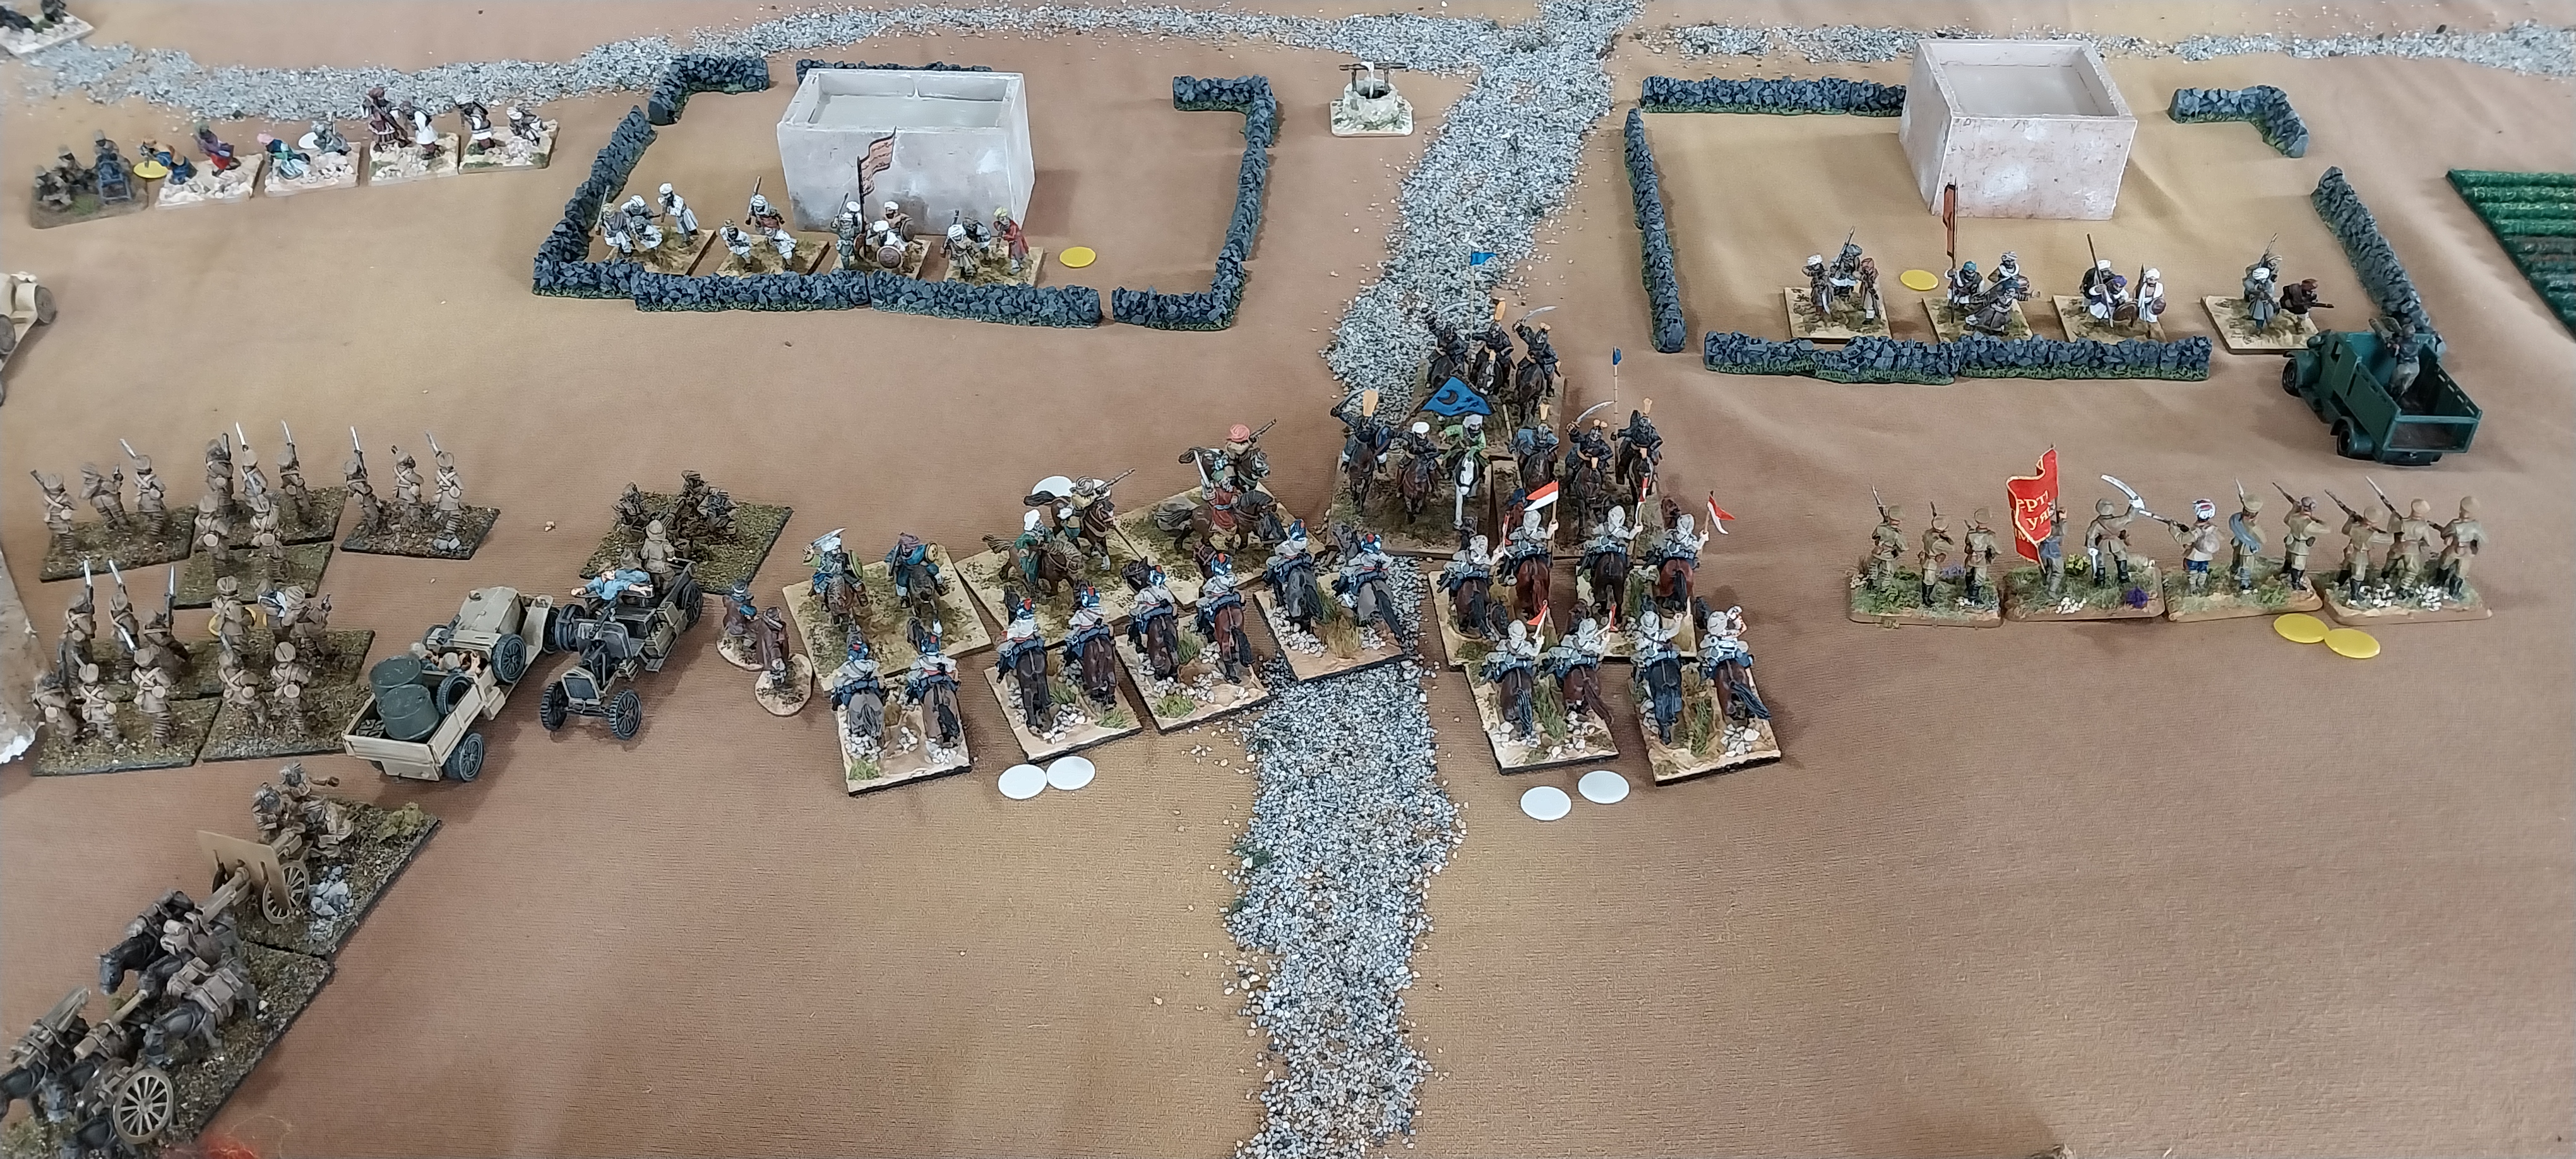
The bulk of my force lined up behind mounted Bengal lancers and dismounted cavalry.
The Whites and Afghans still slugging it out in the centre.
The Bengal lancers charged Barrys newly painted Afghan lancers.....
.... and were driven back - so that answers the "newly painted curse" question!
Nick,
Rick,
and Mark continue to slog it out with Afghans commanded by Paul, Chris and Andrew.
While Barry and I had our own little contest going on!
Both sides had been severely "written down" by multiple rounds of combat.
The Brits under Rick have almost made it to the BUA.
And likewise, some of the Bolsheviks
But those pesky Afghan lancers are still holding up half the Bolshevik force!
View from behind the central Afghan position. In addition to points for getting units off the enemy table edge, there were 6 victory points up for grabs for the side that held control of the two crossroads at the end of the game - the Afghans started in possession of both of them.
Ricks force in close combat with various Afghan enemies.
The last few survivors of Nicks White Russian command
Meanwhile, my force is more or less intact, and the best chance remaining to the European side to attain some of our victory conditions.
Barry and I in lancer to lancer combat again - oh, how we laughed at our dice rolling!
But I was finally managing to make some headway and push through the gap. The dismounted cavalry were remounted, ready to make a dash for the table edge.
The two MG armed armoured cars, supported by the Black Watch, took on the bulk of Barrys infantry.
Nicks portion of the battlefield, mostly denuded of troops on both sides!
Rick and Mark grind forwards against the Afghans in the BUA.
And, of course, the combat with the Afghan lancers is still continuing!
My forces burst free from the confines of the defile, finally!
The lancers charge their opposite numbers whilst the other cavalry unit charges an Afghan infantry unit.
And win both combats, now the great race is underway!
British units stream around the retreating Afghans as they rush for the enemy table edge!
In the centre, the Europeans are also getting the upper hand, but is it too little, too late?
One unit of cavalry made it off the table - 3 points for being the first to get off, plus 1 more for the unit. The Afghans currently hold both crossroads, so it is 4 - 6.
One of the random events - an independent character with a +3 value appears right in front of the Bengal lancers who were just about to exit the table and gain us another point - curses. She opted to shoot, adding +3 to 2 D6 and needing a modified 9 or better for a hit - and rolled a 4!
But then an adjacent infantry unit scored two hits and forced the lancers to retire....ggrrr! Additionally, the previously defeated Afghan lancers had passed a rally test and reentered the fray, charging a truck mounted unit, and forcing the infantrymen to debus!
In our next turn, the Bengal lancers continued to retire, the infantry defeated the Afghan lancers in combat, and the other truck exited the table edge with an infantry unit AND an MG in it - another 2 points to the Euro's!
Although there is precious little of Nicks command left, there are also virtually no Afghans, and he was able to get one of his White units off the board too.
Rick is lining up for an assault on the BUA.
And Mark has finally managed to drive Andrews Afghan lancers back!
Inspirational words for the Bolshevik forces!
I did not rally the Bengal lancers until the very last turn - but in that turn, the infantry adjacent to the vehicle above, managed to exit the table edge too.
And to round out the European victory, Rick forced his way into the BUA, meaning the Afghans no longer controlled both crossroads, so their score dropped to 3.
The Afghans did get points for any European unit still on the table with 4 hits at the end of the game and I think there were 2 or 3, but the final score was something like 8 - 5 in our favour - definitely a very hard-fought victory.
I think everyone (even Rick after an attitude adjustment mid game!) enjoyed the scenario and Andrews rules provided a quick, easy to understand and easy to remember system, which basically breaks down as:
Activation by turn of card - red for Euros black for Afghans - no more than three consecutive turns - aces and kings (in this game) were "special events" - roll 2 D6 for infantry movement, min 4" and 3 D6 for cavalry and vehicles min 6" - firing and combat, roll 2 D6 needing score of 9 or better for a hit, a total of 12 = 2 hits. Units fired at will return fire unless outranged or outgunned eg rifles wont fire back at MG or armour. Combat is almost exactly the same as firing except the loser has to retire 2 D6 (no minimum move) One unit within an inch can support a combat - this adds 1 to the dice roll - there can only be one support in combat. Infantry units take 4 hits then must retire towards their own table edge, until they roll 9 for a rally, vehicles, MG and artillery take 2 hits and then are removed - so, a 12 scored against a tank, destroys it - that's the only way the Afghans could take out most of our vehicles!
There are a few more bits to it but basically that's all - so, you can see why it is easy to remember!
It will be back to some PBJ images next time!