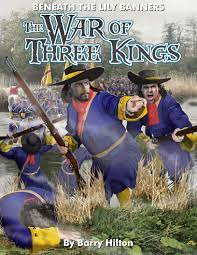
Several years ago, I had a couple of games of BLB with my mate Nick (in fact, it was in the aftermath of these that I built up my GNW Swedish collection) At the time, Nick gave me a copy of the rules and also several pdf scenarios he had found, some of which have only three or four units on each side, and can be played on a 2 ft x 2 ft table - I kid you not!

Trawling through all the stuff I have downloaded and stored the other day, I came across one of these scenario guides called "1690 Seize the Crown" which has three or four mini games based on specific actions during the pivotal Battle of the Boyne near Drogheda in Ireland. I decided to give these a try, using the BLB rules and my WSS figures.
Here are the three pages laying out the scenario:
And here are my images, with a brief description of how things played out. I did change a few things eg I reduced the inches for movement and firing to cm, just to allow a bit of movement before the troops started blasting away at each other. I also incorporated some of Peter at "Grid Based Wargaming but not Always" blogs ideas for activating the "non player side" (the Catholics on this occasion)
In truth, I didn't really need the "AI" decision making much as with the limited space and units available, most of the actions were pretty obvious and did not need much decision making!
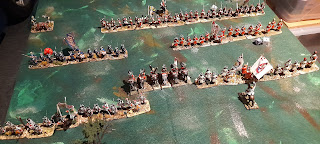
My version of the battlefield, I added a couple of fences and trees to break it up slightly. The Dutch are at the top of the image above.
I actually have the Dutch Foot Guards in my WSS collection - but all the other units are represented by random Dutch regiments for Count Salms force, and by WSS Danish units for James' Catholic force.
The other Dutch Foot Guards regiment
The First Foot Guards and Earl of Antrims Regiment
The Second Foot Guards and John Parkers Horse to the rear. Using Peters solo activation decision making protocol, the Catholic forces held their initial positions on the first move, as the one regiment of Dutch Gard te Voet moved forward - the second presumably delayed by their recent emergence from the icy waters of the river Boyne!
On turn three, the light gun and Regiment Brandenburg arrive to support William's Garden te Voet,.
Gard te Voet - Wargames Factory plastic figures, now part of the Warlord range/
Grey uniformed regiment representing the second Dutch guard unit - these are Reiver Miniatures figures.
View from the Dutch side as the ponderous advance continues. BLB involves rolling a D10 for each side at the start of each turn - this defines whether you can activate no units, a quarter of your total, half, three quarters or all of them - with 1 being none and 9 or 10 being all.
The two units to the right, the First Foot Guards and 2nd Gard te Voet move into musket range of each other.
The Gard te Voet fired first - causing four casualties on James II's guards. They did not get to count the first fire modifier as per the scenario, and damp powder from wading across the chest high River Boyne further reduced the effectiveness of their volley. (I rolled a 5 for the test- odd number = one less effectiveness when firing)
The 1st Foot Guards shrug off the effects of the Dutch musketry and return fire. More Wargames Factory/Warlord figures.
As are these, representing the 2nd Foot Guards, with the 1st Gard te Voet moving up to volley range in front of them.
The Regiment Brandenburg formed a second line, partially overlapping both front line Dutch units, These are the lovely Ebor figures, who also supplied most of my GNW Swedes.
After several rounds of murderous volleys, the 2nd Foot Guards failed a morale test and retreated to the rear.
On the other flank, the musketry was equally hot, with Dutch and Irish guards exchanging multiple rounds of close order musketry. The D10 and D6 represent that by this stage, the Foot Guards had accumulated 11 hits out of 18 figures. The Gard te Voet were not much better off, having started the action with a total of 16 figures. The support of the Brandenburgers to their right was helping tip the balance their way, however.

As the 2nd Footguards continue their precipitate withdrawal (they failed another morale test and carried on retreating) John Parkers Drilled "Blade" Horse move forward. At this stage, I was using Peters solo decision making system - a roll of 4 or more on a D6 would have potentially caused the Catholic force to hold, or even retreat - but I rolled really low and King James men continued the struggle. Given the situation, the decision process called for the horse to charge their nearest enemy, which was the blue coated 1st Gard te Voet. I had put them onto "defend against horse" orders in the last move, as I could see the likelihood of a cavalry charge eventuating.
The cavalry are also by Wargames Factory
And in they go!
Meanwhile, Antrims Regiment moves forward to support the severely weakened Foot Guards on the right flank.
The result of the melee Dutch rolling red dice, cavalry white. A defensive volley had already put a casualty on the charging horse, and this win resulted in two casualties on the winners and three on the attackers - a total of 4/6 - Parkers Horse failed the morale test and charged off in the same direction as the retreating Foot Guards! (below)
On the other flank, the 2nd Gard te Voet had been driven back in disorder by the tenacious 1st Guards, but they in turn were finally forced to retreat by a devastating volley from the Brandenburg Regiment.
With a total of three units out of four in the Catholic force now in retreat, Peters decision making matrix indicated the whole army would withdraw, which seemed eminently sensible, and reflected what actually happened on the day.
The victorious commander, Hendrik Trajectinus, Count Salms (in fact, I think he is King Christian of Denmark by Reiver!)
That all seemed to work quite well although I am not sure I did the firing correctly - I wasn't sure if I rolled a number of firing dice, or just one, adding all the factors to the score, and then consulting the firing casualty chart - I am pretty sure that was right - but the melee works a different way, with you working out the number of dice per side, then rolling and getting hits on a 4 5 or 6 - a bit confusing using two very different methodologies for causing casualties in the same rule set - you could just as easily have one D6 for combat and add the factors like you do with firing....I think I might see if there is anything on You Tube specifically about how firing in BLB works!
Next time, I might try another small solo game but using the Devil to Pay style action tiles in a bag, plus Peters decision making processes. See you then, and if you have enjoyed this report, please do leave a comment.


.jpg)
.jpg)
.jpg)
.jpg)
.jpg)
.jpg)


.jpg)

.jpg)


.jpg)
.jpg)


.jpg)
.jpg)


.jpg)

Thank you for taking the time and care to present this. A complete look at the root scenario, a wonderful tour of the units and which castings you used. Your report on how the mechanics of the rules affected play was helpful as well. Maybe we will see your glorious Swedes in an upcoming episode?!
ReplyDeleteThanks Joe, your fulsome praise is much appreciated - funny you should say that about the Swedes - this group has created some smaller scenarios for GNW too, all I will need to do is substitute Danes for the enemy (the Swedes did deal to the Danes in a Lightning War before getting started on the Saxons and later Russians!)
DeleteI agree with Joe, your battle report provides a useful glimpse at the mechanisms behind BLB. Enjoyable battle report and good to see these armies out on the table. Based on this brief peek, I do not think BLB is a game for me. Casualty tracking by figure? How Last Millenium!
DeleteDigging through all of the wargame stuff downloaded is an admirable task. Amazing how quickly we accrue stuff we think we may one day need. How often do we actually use this material? Good to see you putting this to good use.
Glad you appreciated the report Jon, even if the rules are not for you! I admit, I found the casualties a bit of a chore to keep track of
DeleteGood to see a game on a small table, which is a great size to get to the core mechanics of a set of rules. Lovely to see your figures in action too:). It also reminds me that I haven't got a game in for ages nor have I tried out BLB War of the Three Kings:(.
ReplyDeleteAh well, there you go Steve, I am providing a public service....hope to see you rolling out a late seventeenth/ early eighteenth century battle in the next week or so!
DeleteWhen you do your end of year report, please consider marking this one up as the best post of the year :-)
ReplyDeleteSmall table games do seem to be a major aspect of these rules - hoorah Mr. Hilton!
Lovely job on your game, not so long ago I downloaded a napoleonic package from Barry Hilton in which he bases his scenarios on what he calls 4x4 - splendid!
Wow, praise indeed Norm! I could have gone into A LOT more detail, this is a weighty ruleset with lots of nuance.
DeleteGreat to see your take on these rules.i have the 1st edition sitting on a bookshelf somewhere. May have to dust them off
ReplyDeleteCheers Scotty....I think there is a significant difference between the versions....from what I saw on some reviews, earlier versions used D6 8 10 and 12 for different qualities of troops, with a common requirement to score a 6 to hit when firing. Funnily enough, I quite like that idea, but in the set I have, everyone uses D6 but adds modifiers.....
DeleteI have heard of this set so it is great to see such a detailed run-through. I quite like casualty tracking and always enjoyed looking up the casualty table in George Gush's renaissance rules. Might be worth a look if I ever get two sides of a renaissance conflict completed.
ReplyDeleteThanks Lawrence. In terms of tracking, the rules do provide a roster sheet template for recording casualties. In fact, that part is supposed to be semi secret, so the opponent can't just look at a unit and see its half strength etc, as a real life general would not be able to tell this with certainly
DeleteReally interesting game and set rules!
ReplyDeleteBest regards
Thanks Michal...would be great to see a game report on your blog one day!
DeleteGreat battle report and to get a game at this scale out of a 2x2 ft board is amazing!
ReplyDeleteThanks JBM....I actually fiddled with the ground scale, changing inches to cm, which made it last a bit longer. I think in the Barry Hilton original, it was all over in three or four turns...my game took about sixteen, albeit, that was still only probably an hour to hour and a half hame time!
DeleteOr, even "game time"....being a Scot, " hame time" means something completely different to me!
DeleteExcellent report. Pike&Shot or Tricorn-style games are on my someday list!
ReplyDeleteLoA's 4Play scenarios are intriguing, and Barry's knowledge of the period is unmatched.
Thanks a lot Greg, I agree about the scenarios and also about Barry's encyclopaedic knowledge of the period. This particular period, the Glorious Revolution when the crown passed from Catholic James to Protestant William and Mary could be a controversial one, given its the main basis of the antipathy between both communities in N Ireland, and to a lesser extent, in the west of Scotland too...think Galsgow Celtic and Rangers....The Battle of the Boyne on 12 July is still marked with Protestant parades and usually some Catholic rioting in response.
DeleteI greatly enjoyed your report Keith. Having both played and umpired BLB I can agree that they provide an enjoyable game, but has "interesting" mechanisms.
ReplyDeleteThanks Richard, I enjoyed the previous games with Nick but relied on him a lot to guide me through the rules....I doubtless missed a lot out and got bits wrong on my own, but I had fun, so that's the main aim achieved! I actually prefer the sound if the old system, where six is a universal success, and raw troops use D6' trained D8 elite D10 and Guards D12....
DeleteLove the rules and tbe period. I do have a few figures for the period myself?
ReplyDeleteGreat looking game though, with some crackin looking figures too!
A nice little scenario and game Keith…
ReplyDeleteI haven’t played Lilly Banners for quite a while…but I am now tempted to dig them out again.
All the best. Aly
Cheers Aly! I am hoping to get another game in shortly, so may be able to provide even more inspiration!
DeleteAs so many others have said, great report. Thanks!
ReplyDeleteThanks Peter, I enjoyed the game and doing the AAR afterwards.
Delete